
A lot of businesses use social media as part of their marketing strategy. It is a great method of communication and getting in touch with your current and future consumers. With such a wide reach, not incorporating social media in your business operations can have negative consequences.
Let’s have a look at some automation software that can enhance your social media prowess and make your engagement that much more effective.
This guide will walk you though all the important steps of Buffer software and how to connect it with EvergreenFeed for most optimal social media marketing experience.
Buffer Sign-up
So you have decided to use Buffer to enhance your social media strategy. First things first, you need to create an account on this platform.
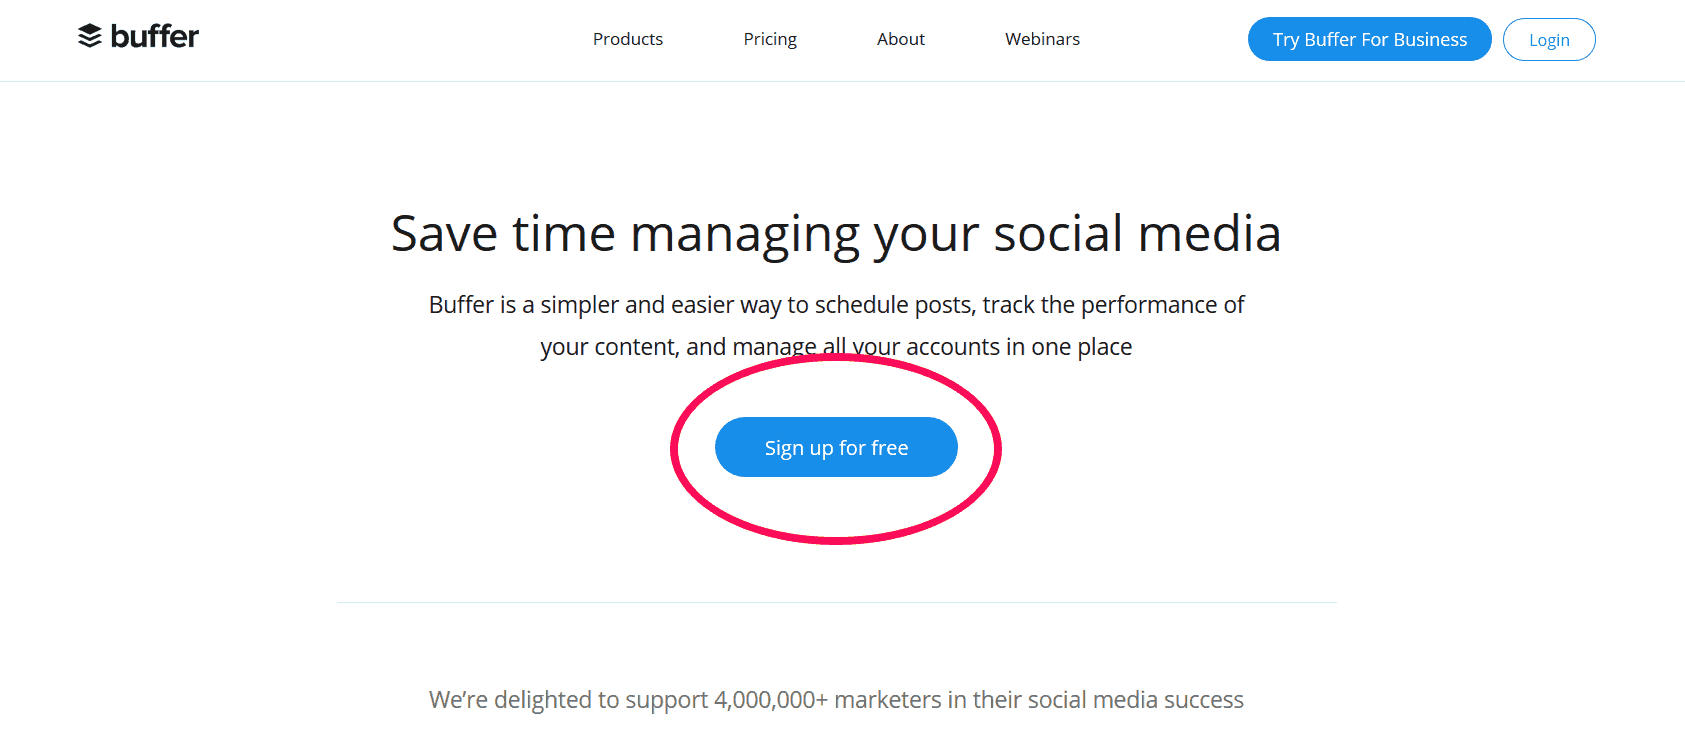
The sign up is absolutely free. There is no need to use your credit card at any point. You should be aware though, there are premium versions of this service as well that requires a subscription.
This step takes less than a minute to accomplish.
Login with Social Media or Create Account
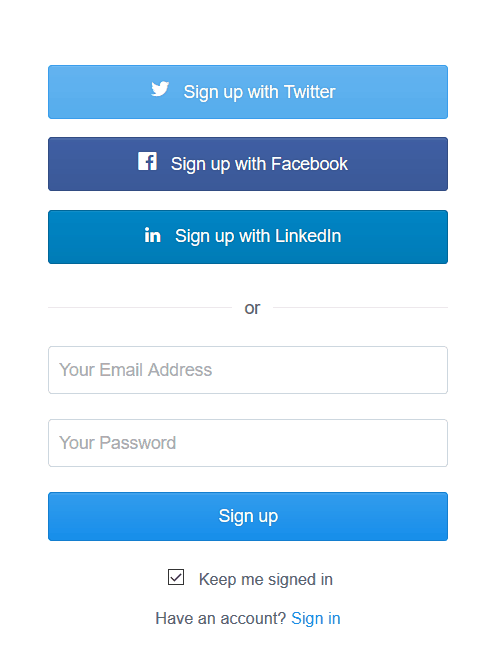
If you want to speed up your process, you can use your already existing social media account from LinkedIn, FaceBook or Twitter. If you don’t want to do that, just use your email.
Don’t worry about using your email for the sign-up process. You won’t be receiving any annoying spam in your mailbox.
Welcome to Buffer
So you have completed the sign-up process. Wasn’t too difficult.
You have now arrived at the glorious Buffer dashboard. This is where the magic happens.
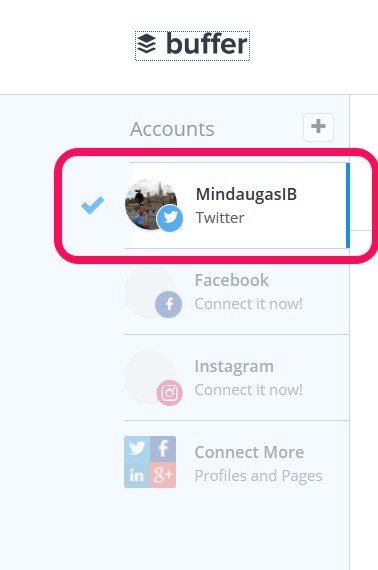
Like most of us, and most businesses, you probably use more than one social media account. That’s great, because Buffer allows you to link the ones you use on this single platform. Makes engaging your audience a whole lot more convenient.
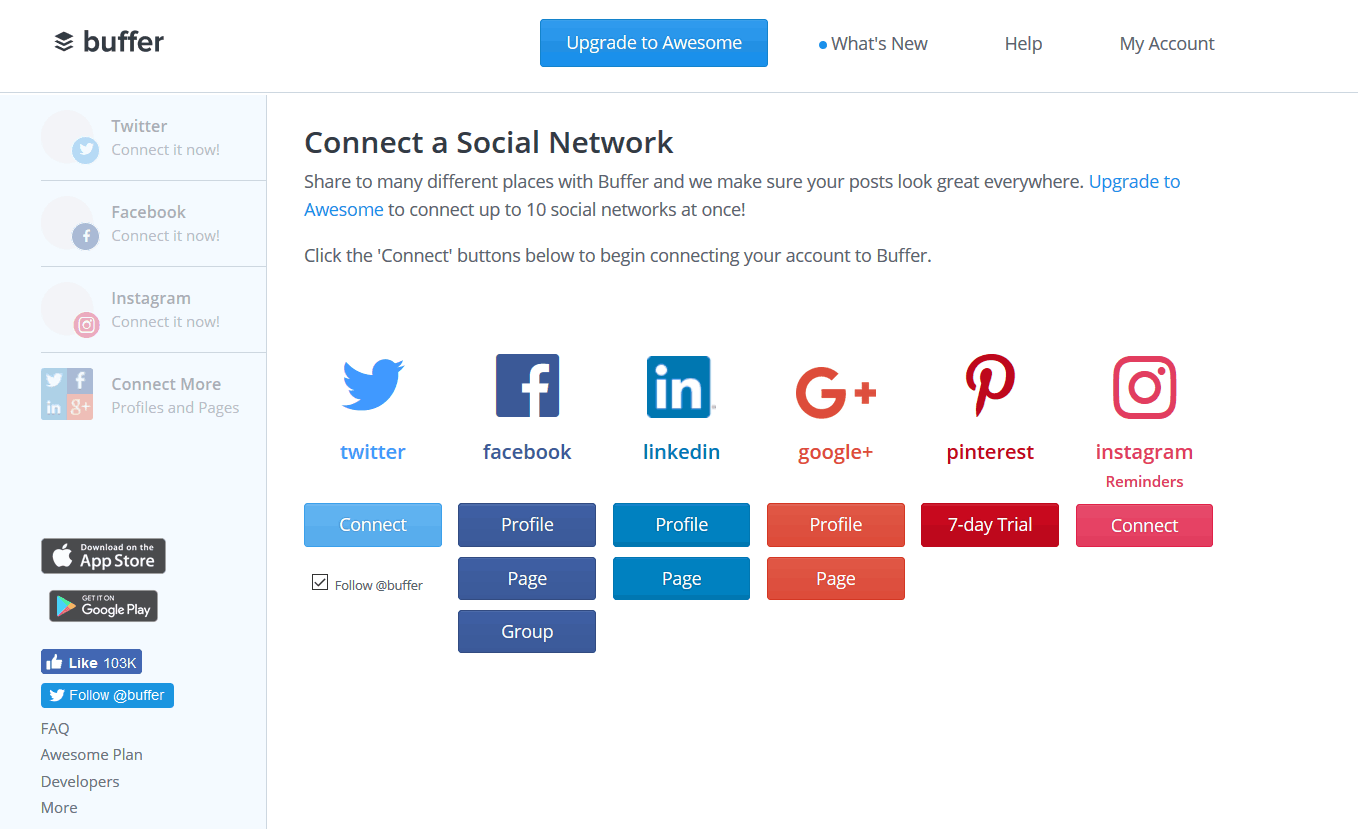
Connected Social Media Platforms
Here is where you will find all the social media pages you have chosen to link to your Buffer account. Switch back and forth through any platform at a click of a button.
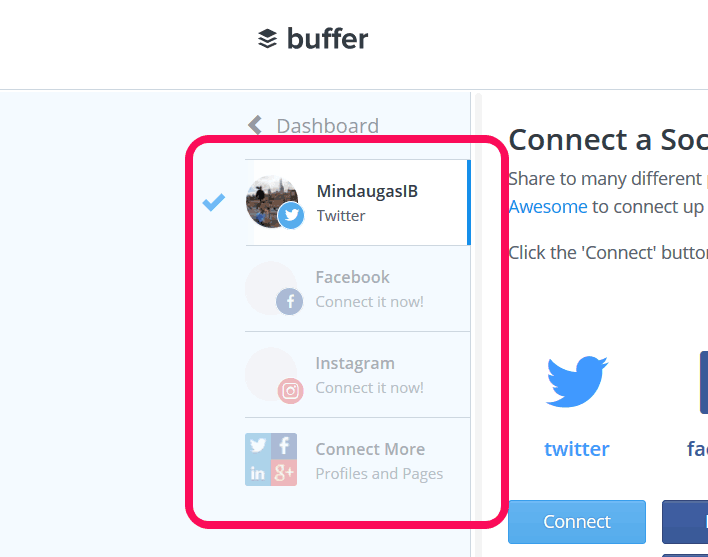
For now, we are going to work with Twitter. Here I have selected Twitter as the social media platform I want to link with my Buffer account.
Authorise Your Twitter Account
The first time linking social media accounts, Buffer will ask you to authorize their software to work with the social media platform of your choice, in this case it’s Twitter.
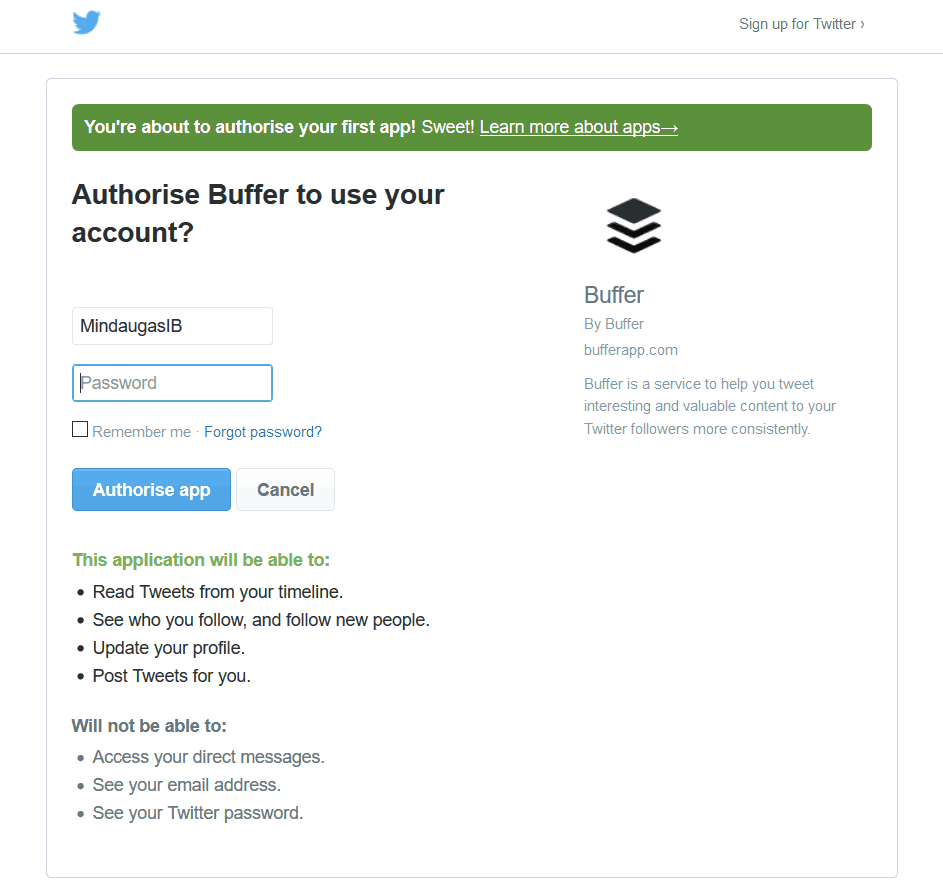
Just sign in with your log in information as you normally would, and this will authorize the use of the social media account through Buffer. Repeat these steps with any other platform you wish to connect.
Twitter Page
Now you have finally linked your Twitter account to your Buffer. This is the page you will get to next. On the top you notice there are 3 tabs – content, analytics, and settings. I will walk you through each of those tabs and all the goodies that contain within.
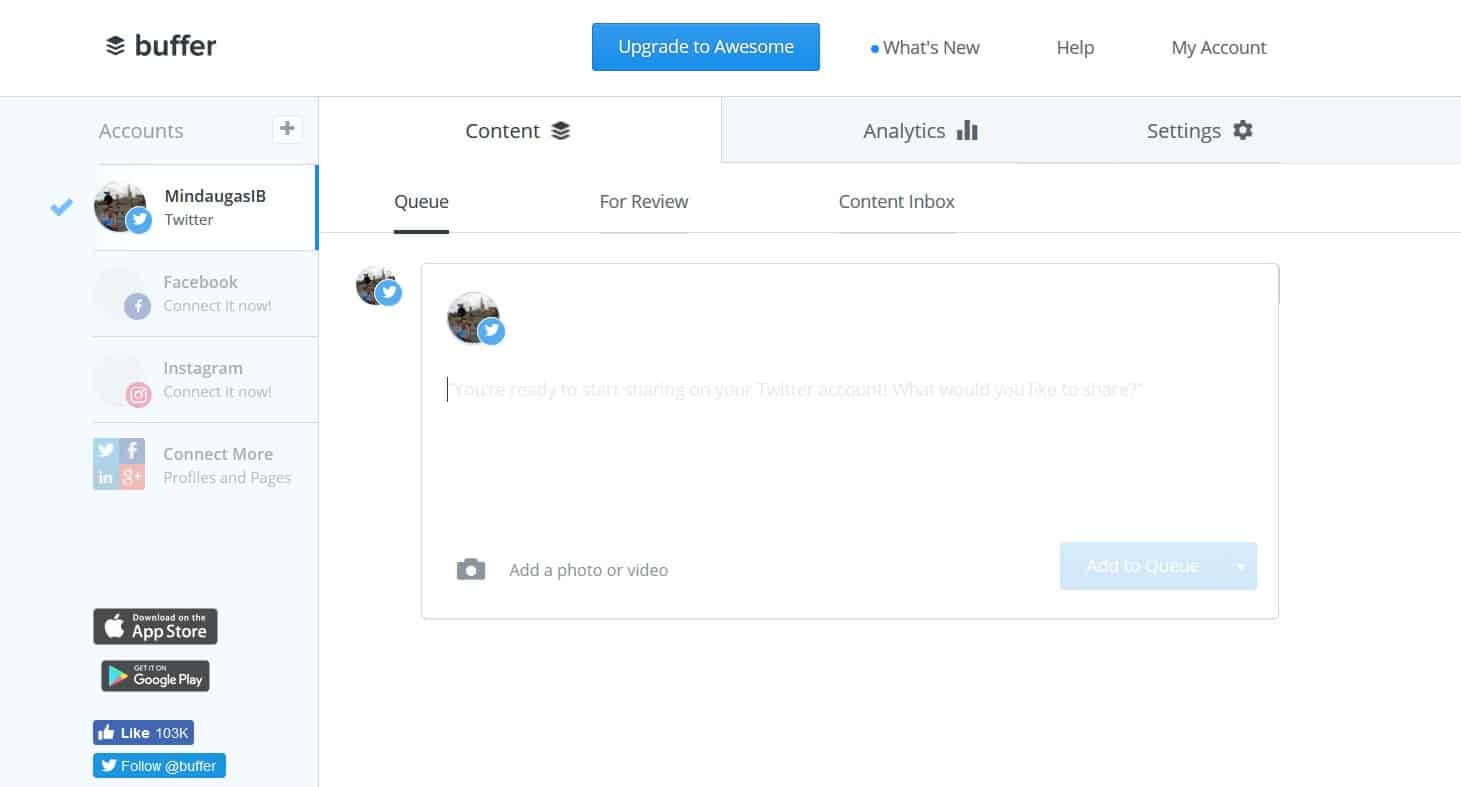
Let’s Not Forget Photos and Video
Of course, all the functionality of a Twitter page will carry over to your Buffer. You will even be able to share your photos and videos along with your usual 140 character tweets.
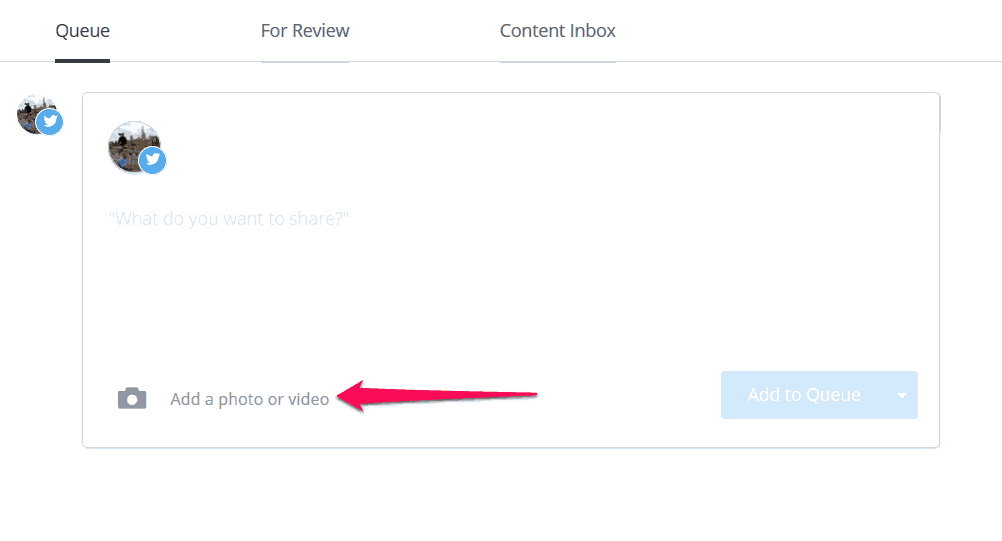
Queuing Posts
Content tab that is found at the top of Twitter dashboard on Buffer will allow you to gain access to tweet creation and publication functions.
Any tweet you write can be posted right away, or can be schedule to be posted at a later date. The “queue” option stockpiles all the tweets you write and publishes each tweet based on the position in the queue.
You can change the timing for your automated posts at anytime you’d like. Nothing is set in stone. If anything comes up and you need to change or delete your queued up content, you’re more than welcome to do so. You can delete each tweet individually or delete the entire queue at once. How to delete the whole queue will be covered later on in the guide.
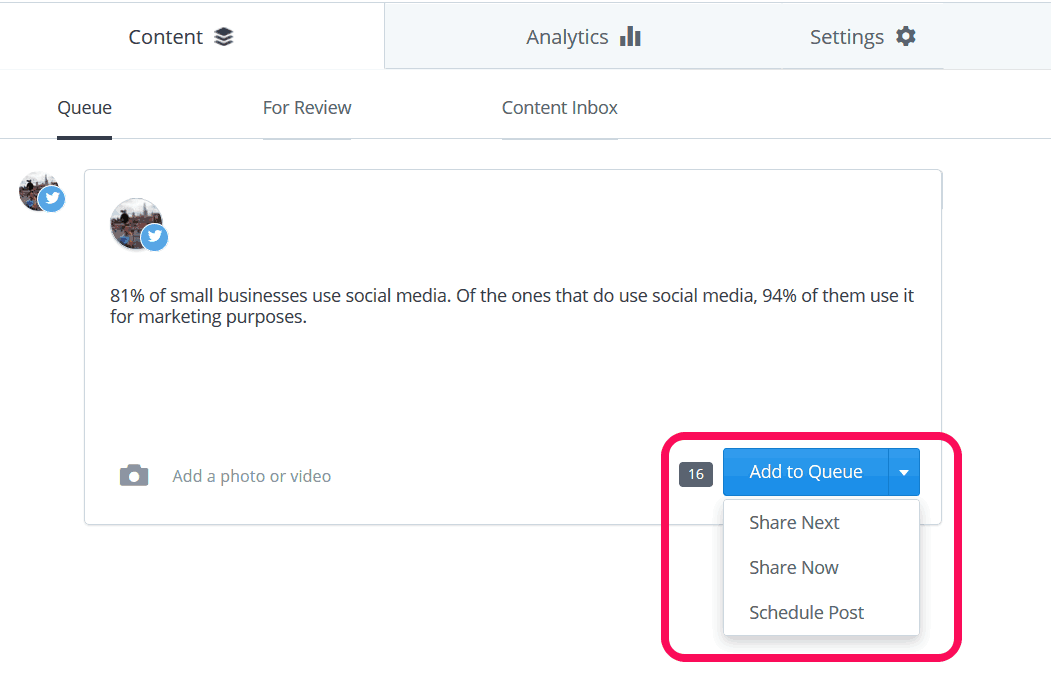
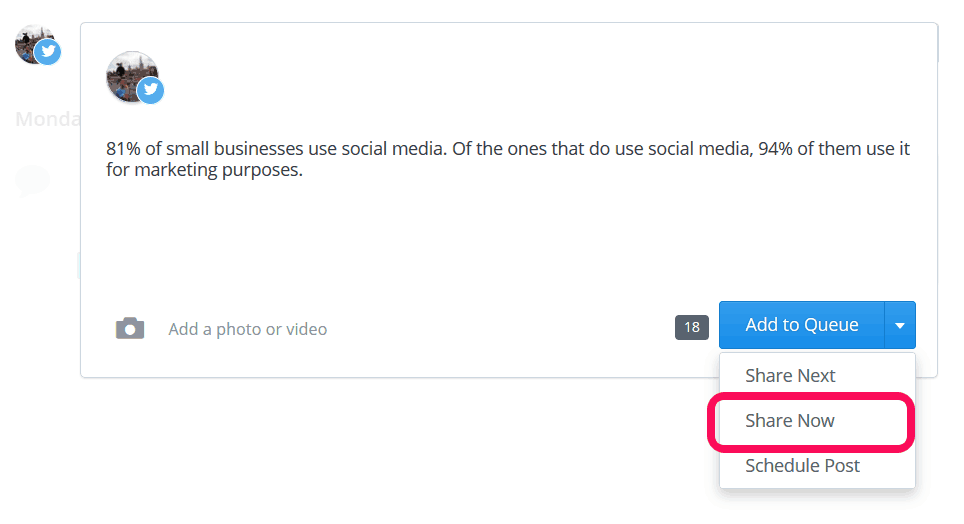
Or Don’t Wait and Share Now
Now sharing your tweets doesn’t always have to rely on scheduling. You can share tweets instantly along with your queued up content. Press the drop down menu where the blue button is that says “Add to Queue” and use the “share now” function to send your tweet instantly.
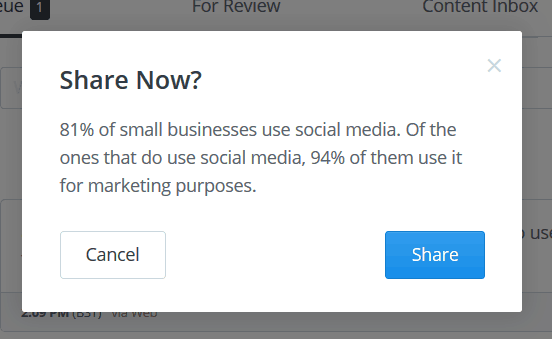
Before you take the plunge to instantly share your content, you will be greeted with a confirmation box. As you can see bellow this text, there is an example of what the confirmation box looks like. If you are sure of your decision, just press “share” to confirm and your job is done.
Analyze Your Content
We have arrived to a point where you have learned to utilize the functions of Twitter on your Buffer social media platform. I am sure by now, you have a solid queue of quality tweets waiting to be delivered.
Let’s look at how your older posts have fared with your audience. Did they have the impact that you had hoped for? Well this is where the second tab comes into play – “analytics”.

Gauge Performance
Evaluate your posts and how well they engaged your audience. Analytics tab will let you see how many people retweeted, commented, or liked your tweets.
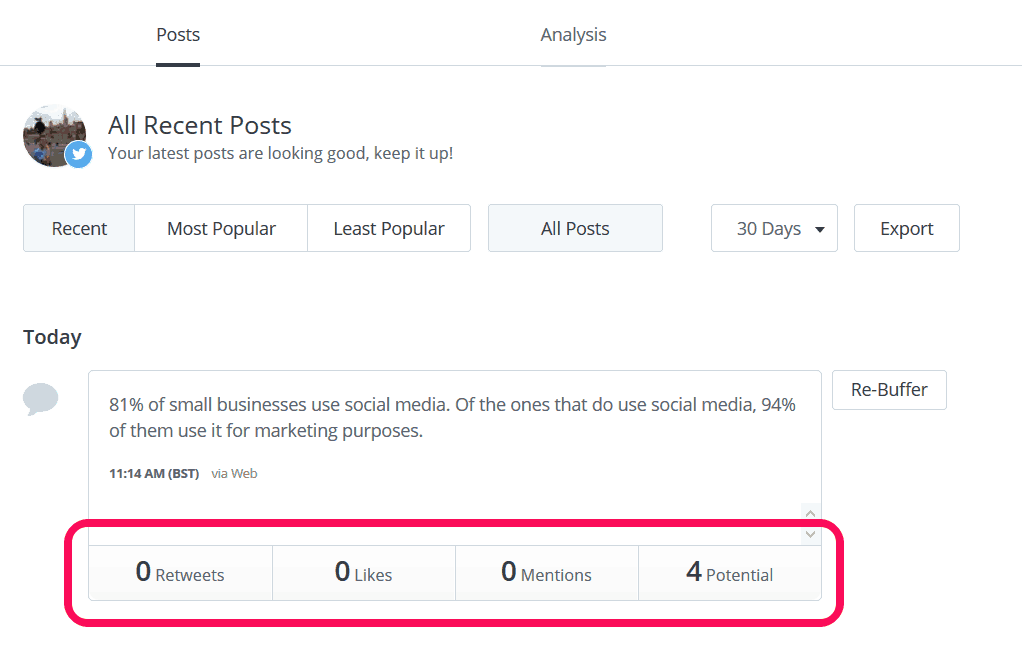
This data is great to see how well your posts resonate with your followers. If your content doesn’t do so well in terms of retweets, likes, or mentions in relation to your potential, you may want to adjust something for the future.
What Performs and What Doesn’t?
As you post more and more, Buffer will keep gathering data on how well your posts and twitter content have been performing. It will even give you an option to rank your posts based on popularity.
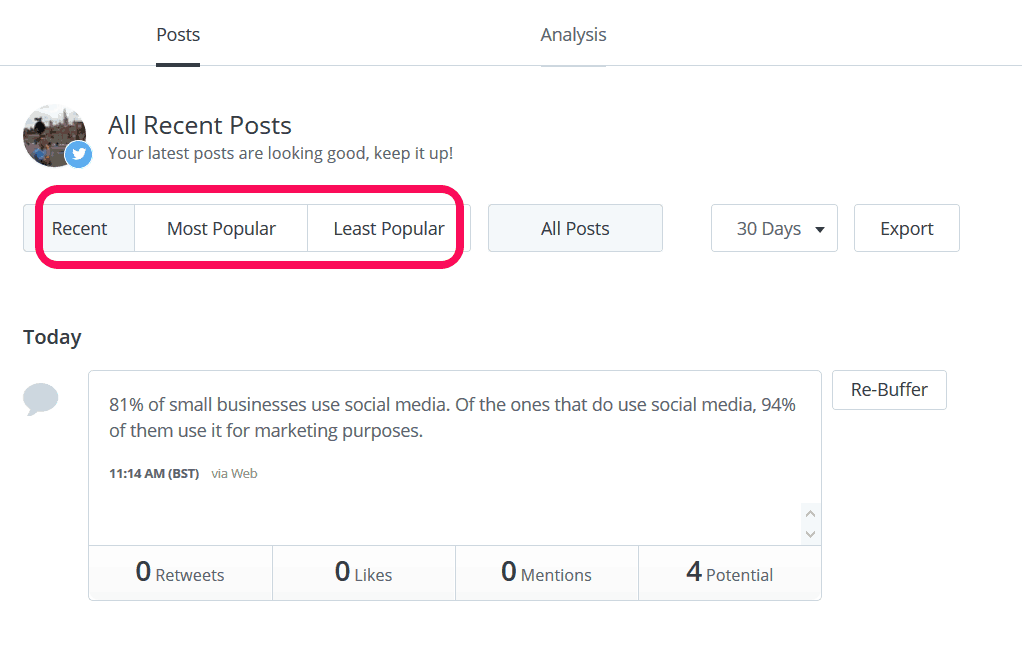
Most Popular
Ranking your posts based on “most popular” filter will give you your top performing tweets. This will let you know what type of information and content your followers are interacting with and may continue to do so in the future. You will have a basic understanding on what to continue to focus on in your future posts, since you will know what type of content your audience engages with the most.
Least Popular
Ranking posts based on “least popular” filter allows you to view the posts that didn’t do well in terms of attracting the audiences attention. Mistakes do happen and you learn from them. Having this information will let you avoid some of the topics that your followers didn’t engage with in the future posts.
Sort By Type
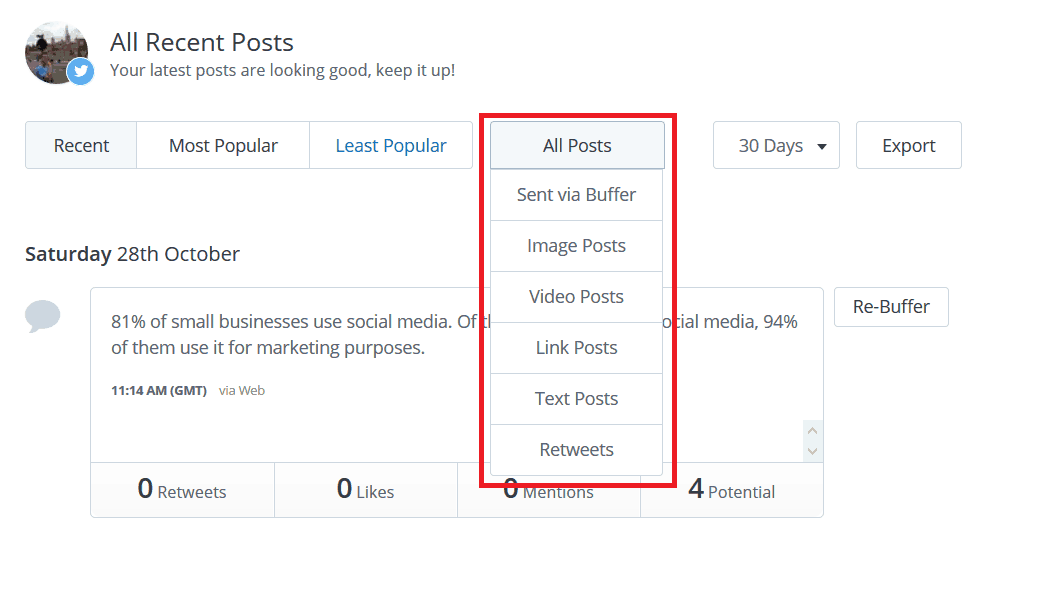
Other filter option includes sorting your Twitter posts based on the type of content posted. Select the category you want and add other filters along with it such as “most popular” and “image posts”.
Settings
The settings menu at the top right opens up options for content distribution and queue controls.
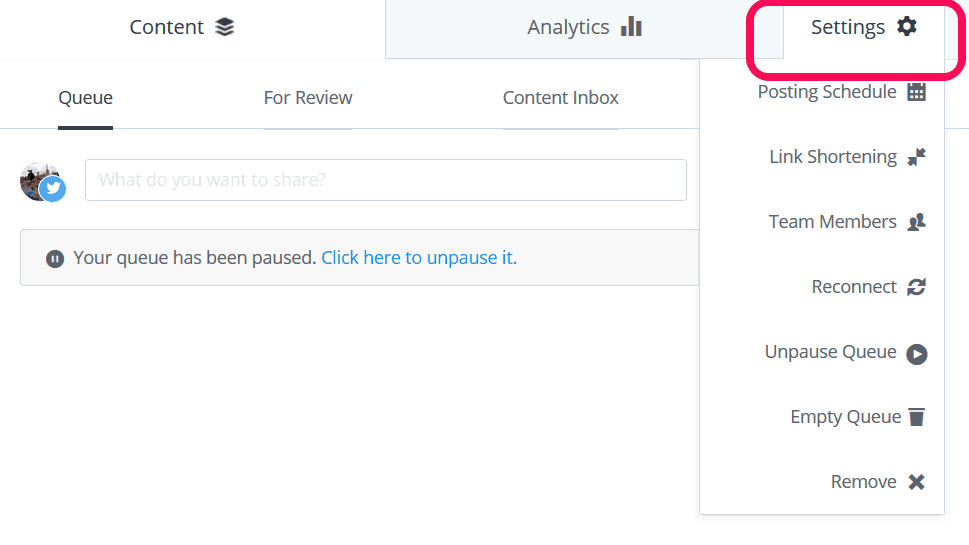
Okay, now let’s look at what each of those drop-down menu buttons do.
Posting Schedule
This is just a calendar for your queued up tweets.
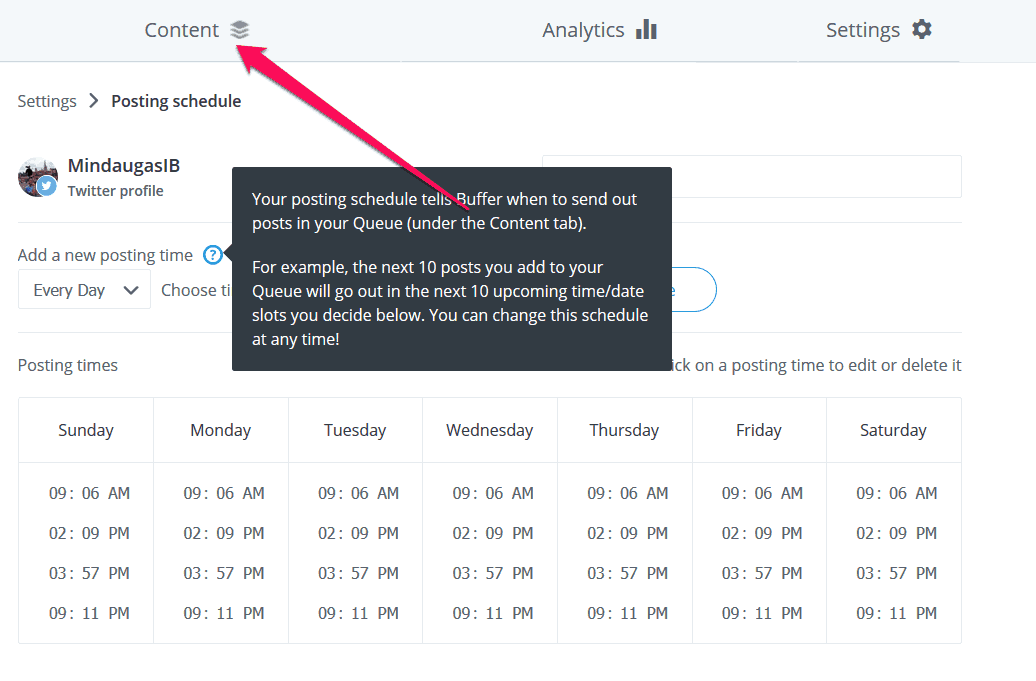
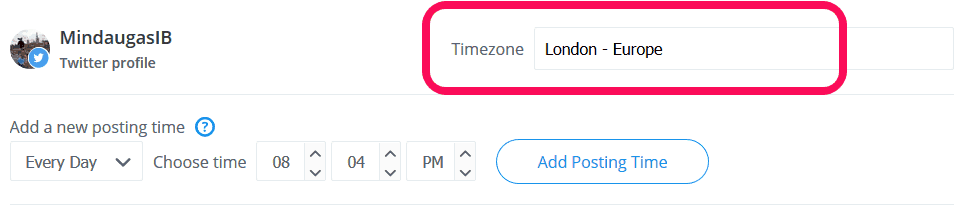
Timezones
All the times can be adjusted to best suit your needs. You even have the option of selecting the timezone you find yourself in or the timezone your audience is in. This will help you get the tweets out at the most optimal time.
Scheduling
Proper scheduling may take some time to perfect. You will need to constantly stay in tune with when and where your audience is most active. This can be a time consuming process but I suggest that you take time to understand it properly.
Remember that pushing out content during certain peak times will create the most optimal environment to get users to engage with you and your content.
Buffer will allow you to automate your post schedule so you don’t have to worry about staying in front of the computer to press “submit” during those crucial hours.
Link Shortening
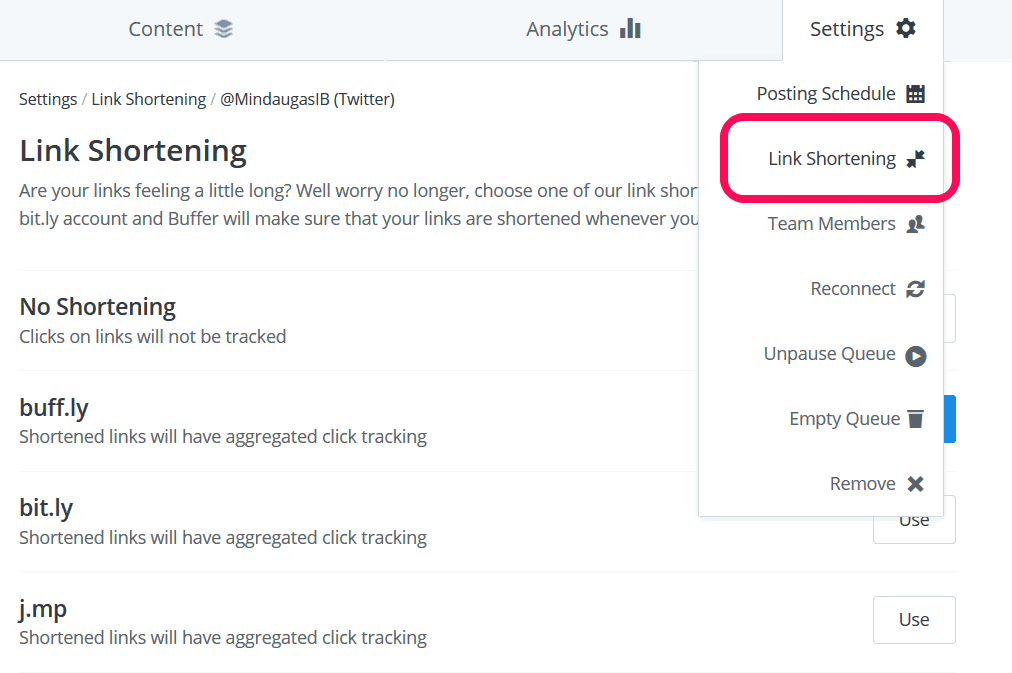
Not all links are short and easily manageable. And of course on Twitter, with the limited character count, you don’t want your links to be too long to even post. Here is where link shortening comes into play.
If you have this option enabled, it will automatically shorten any links you have submitted in your tweets. Isn’t that just convenient?
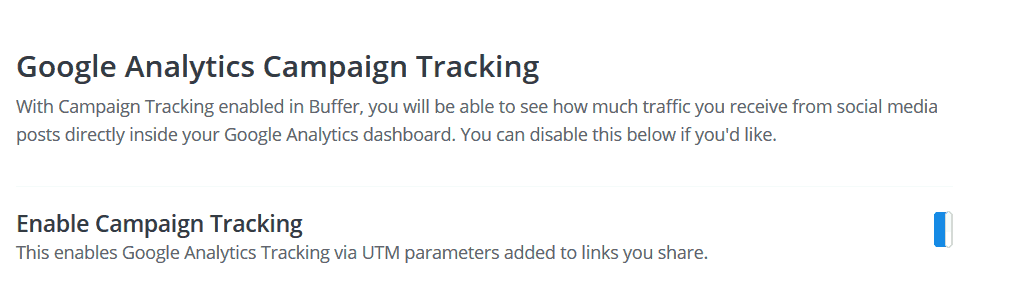
Link Tracking
Any link you have added to your posts have the ability to be tracked by Google Analytics. There is an option on Buffer that if selected by you, will track user interaction with the links you have provided in your content.
Queue Settings
Pausing
There may be a time when you need to pause some of the automation. You could have run into a snag here and there or some information you have lined up has changed. Put a pause to your schedule, it’s no biggie. Again under the “Setting” button, in the drop down menu, you will see “Pause Queue” button.
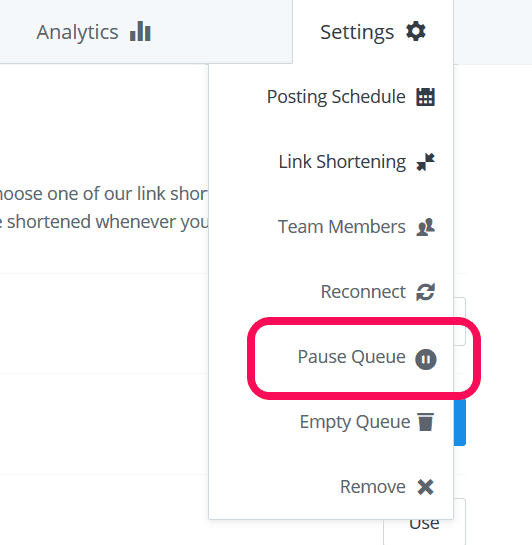
Once you have paused your queue, you are free to make any adjustments you need or just wait until you are ready to let Buffer take things over again. It only takes a second to pause and un-pause your automation.
Un-Pause
Un-pausing is as simple as pausing – a second long endeavor.
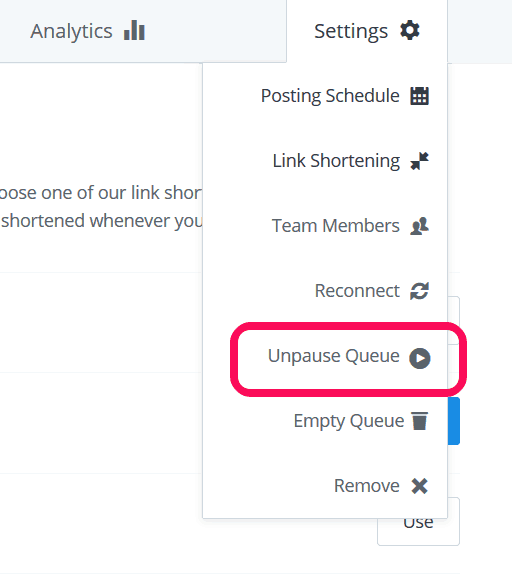
The button that once was “Pause Queue” has turned into “Unpause Queue”. Again, whenever you want to go back to scheduled automated posts, just press it. Buffer will take care of the rest.
Empty Your Queue
Perhaps something changed in your social media strategy and the queue of posts you have lined up no longer satisfies your needs. Well don’t sweat it. There is no need to go through each post to delete them individually. You can clear your queue with a single button click.
![]()
This option simply clears out the queue of posts you have created for your Twitter page. Really think hard before going through clearing out your queue like that. It’s permanent.
Last Words on Buffer
As you can see, automating your Twitter feed with Buffer isn’t rocket science. It is a rather intuitive software platform that works well with not only Twitter but other social media pages. Give it a shot, and see how it helps you boost your social media presence.
What About EvergreenFeed?
Almost forgot to mention another great Twitter automation tool – EvergreenFeed. Let’s go over this piece of software too. EvergreenFeed integrates well with Buffer, the social media software tool that we covered just moments ago.
I will give you another walk-through on how to use EvergreenFeed for your Twitter automation.
Alright, so let’s start at the beginning.
Sign-Up
Sign-up process is quick and easy. No messy hoops to jump through to proceed with registration. On the home page you click the nice blue button on the top right “Signup” and you’ll be greeted by a short form for your to fill out.
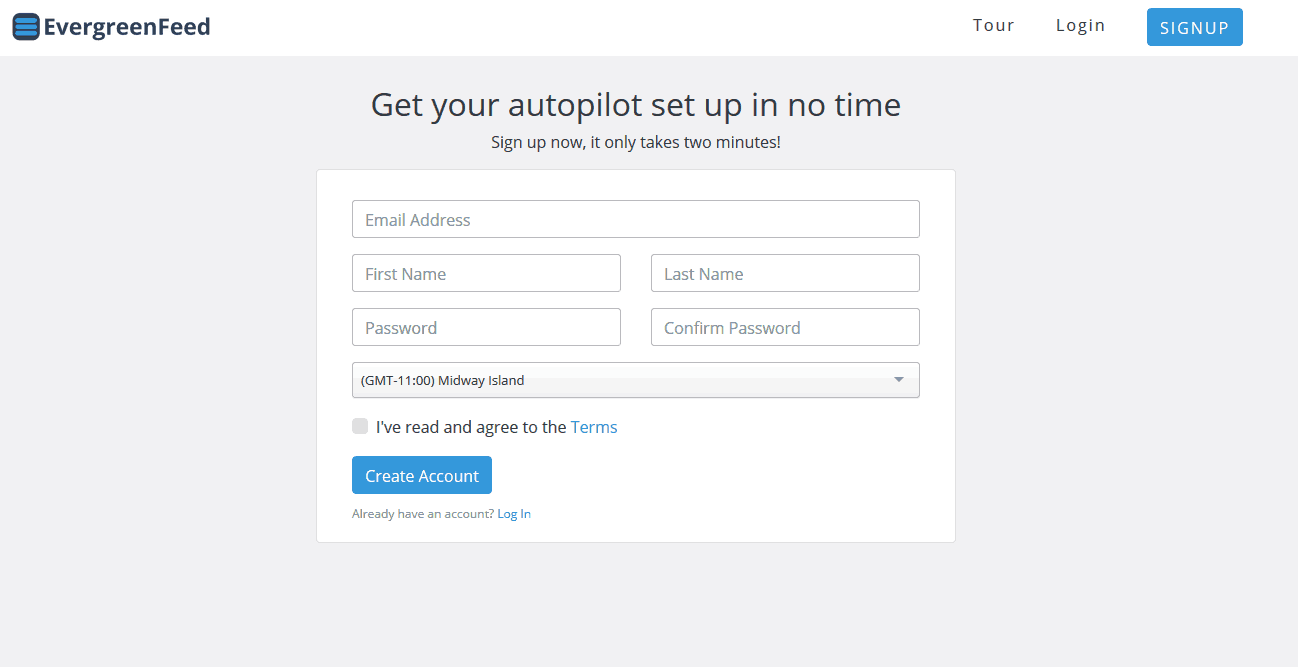
Typing in your information into the form shouldn’t take you more than 60 seconds.
Login
Now you have gone through the “lengthy” registration process, it will take you to the starting screen. A small guide will pop up, guiding your initial process to set up your Buffer account with EvergreenFeed.
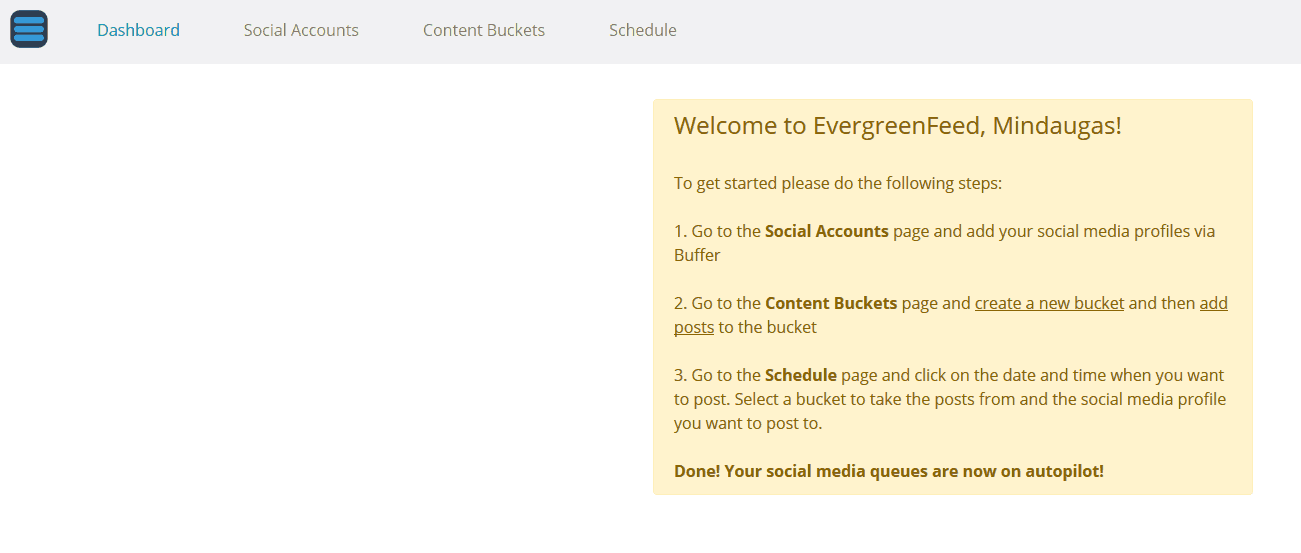
As you can see from the initial short walk-through, using EvergreenFeed is incredibly simple. May even be the simplest social media automation software out there. Read over the steps listed out for you.
Let’s go through those steps together.
Social Accounts
When you press “Social Accounts” button, you will be taken to a blank page. You will see a button at the top that says “connect to Buffer”. Since we just walked you through how to use Buffer, you should already have created a Buffer account.
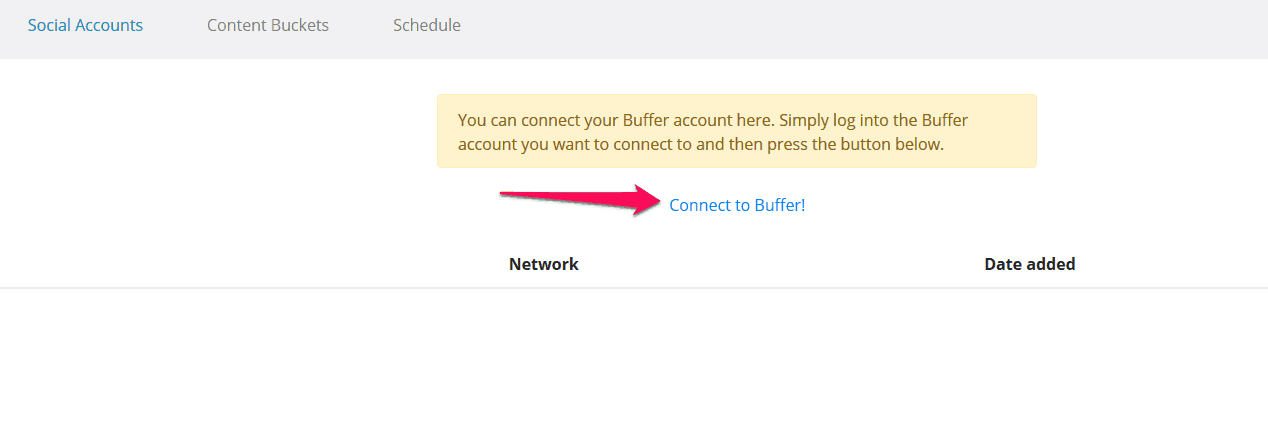
Once you have pressed “connect to Buffer”, you will be asked to allow access to Buffer. This will allow the two pieces of software to work together for most optimal social media automation experience.
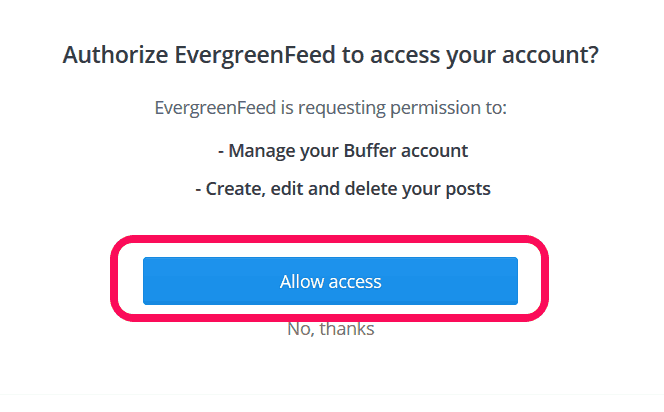
So now you have synced up EvergreenFeed with Buffer. One last step left to complete this integration process. You will have to select which accounts you want connected between EvergreenFeed and Buffer.
You can add multiple accounts if you so choose.
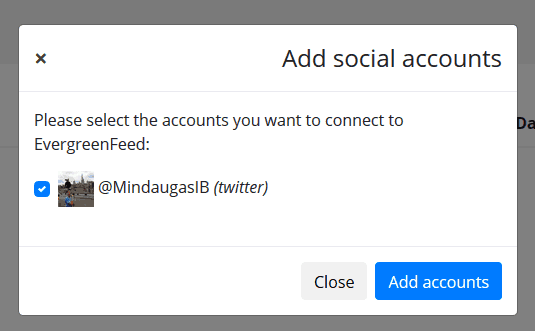
Syncing Complete
Select which account or accounts you want to be synced between Buffer and EvergreenFeed. In my case, I only synced one account for this example.
You will get to this page after you have completed the process.

Creating Content Buckets
We have now arrived at the fun part – creating content buckets for your post automation. Very simple process to learn how to do. Let’s jump right in.
You will press on “Content Buckets” button at the top of the screen.

This will take you to the page where you can create different categories for your Twitter post clusters. The whole point of creating content buckets is to assemble content that may be similar, or should be posted on a certain schedule that differs from your other content buckets.
Buckets are just organizational tools for your posts and your overall automation process.
First Bucket

When you decide on creating your content bucket, just press on the big blue button on the far right of the screen. It will give you an option to name it anyway you’d like. In my example above, I already had created a bucket and decided to name it “digital marketing”.
As you can see, there are 0 posts in that bucket. No problem, we will fix that issue right now. What you want to do is press on “view posts” button in the center.

When you click on “view posts” button, it will take you to a new screen where it allows you to create your tweets for your content bucket.

Now we have arrived to the vacant Digital Marketing bucket. All that’s left to do now is to create a post or posts that will suit the bucket of choice.
Since this is Twitter automation software, the functionality remains the same as it is on Buffer and Twitter platforms. Standard tweet size of 140 characters and the ability to post links or upload media.
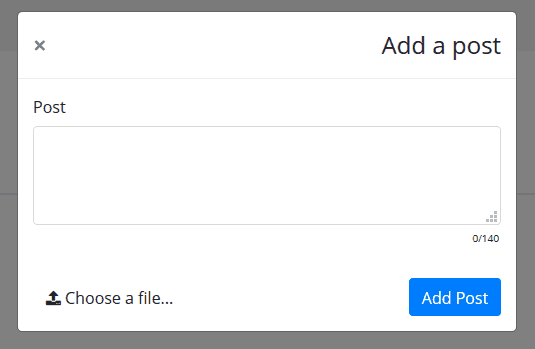
When you are done writing your post or uploading your media, just press add post. It’s that simple.
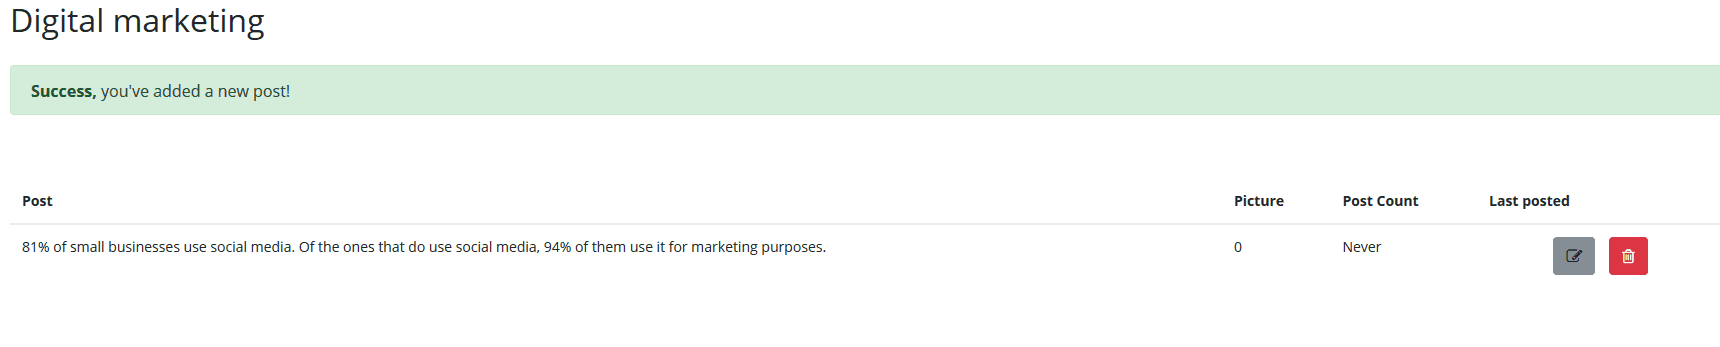
This is the screen you will see after submitting a post. Of course, on the far right you have the option to edit, or delete the post you have just created.
You are now ready to move onto the next step. Scheduling those buckets of yours for automated submissions.
Scheduling
Again, if you look at the top of your screen, next to “content buckets” button you will see “scheduling”. You are now prepared for the last step. Click on “scheduling” and let’s see how it all works.

There are filters for you to look through. Which account you want to view and which bucket you want to schedule for automated posting.

In this case since I only created 1 bucket, doesn’t matter what i pick – all buckets, or “digital marketing” bucket. Now it’s time to move on to setting up dates and times when the software publishes your content.
Time Table
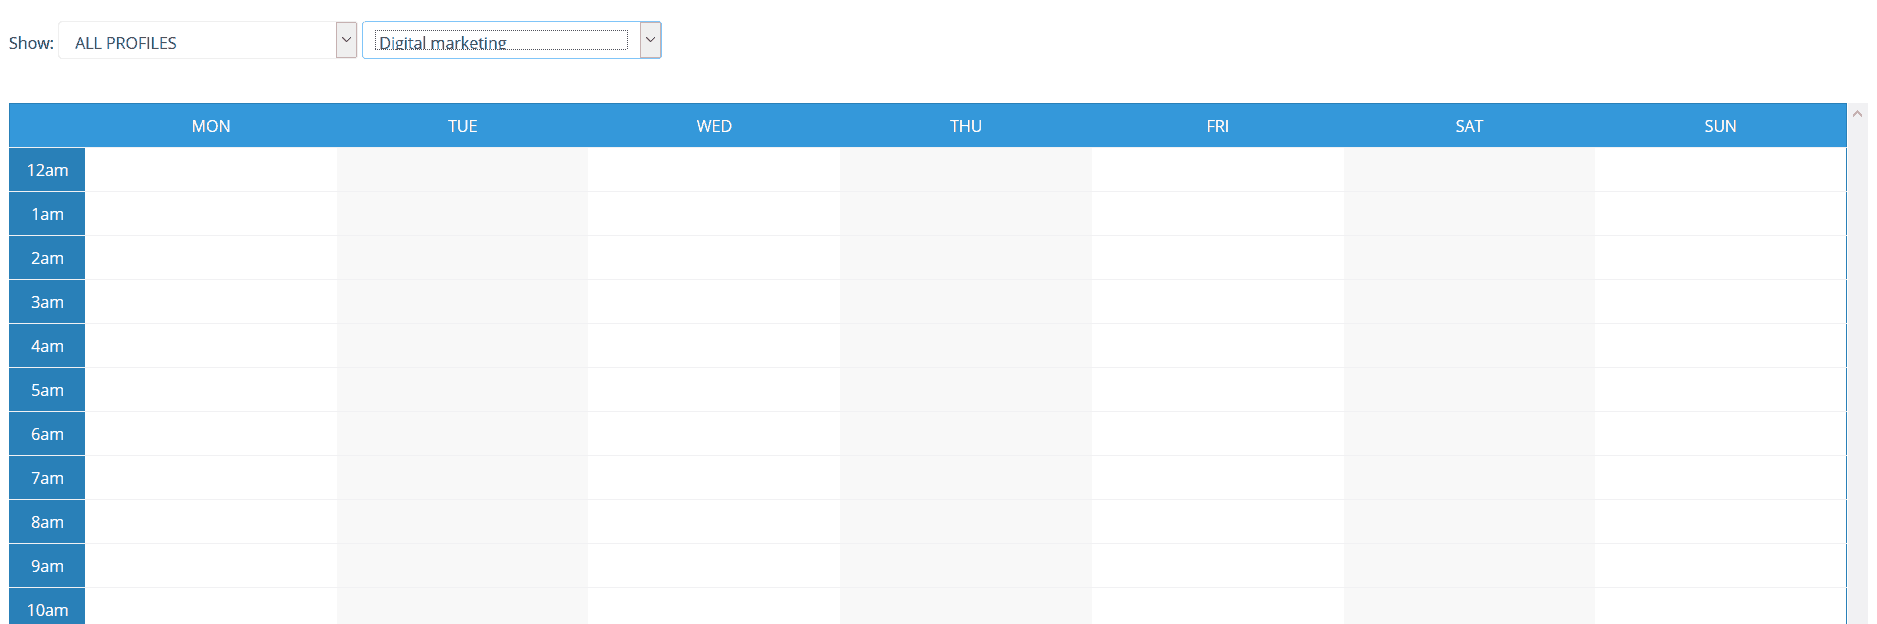
So this is what your time table looks like. Goes Monday through Sunday – every day of the week. Click any of the empty slots to open up scheduling settings for your buckets.
Here is how the time slot configuration looks like –
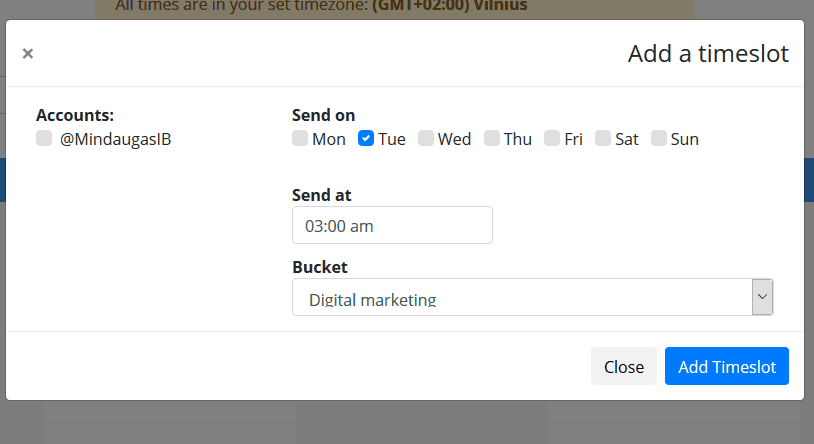
If you are happy with the selected time, just press the button “add timeslot” and you are all set.
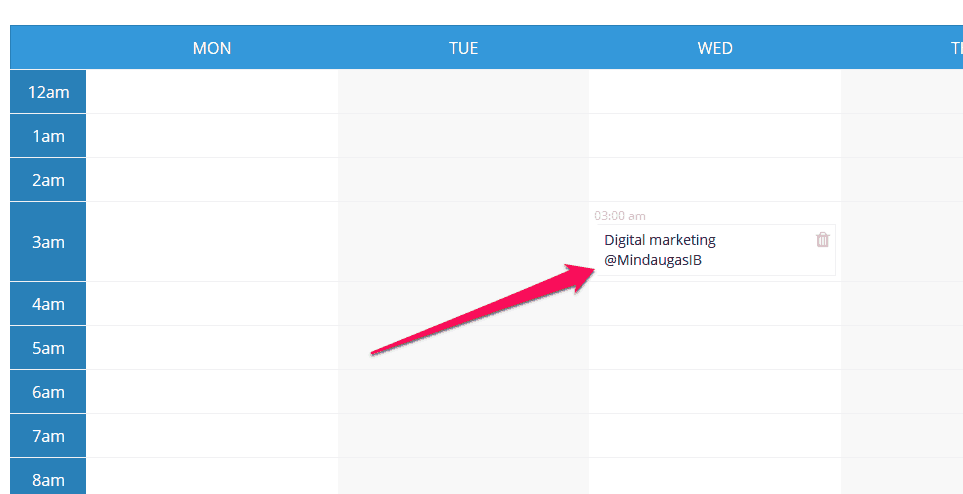
I have set my “digital marketing” bucket to be posted at 3am on Wednesday morning. If you choose to alter your scheduling time, just press the little trash can icon and delete your scheduled bucket. You will then be able to select any other day and time that works for you.
That’s All Folks
As you can see, automating your social media isn’t all that difficult. These automation software services that you have at your disposal are intuitive and easy to manage. Plus you have this nifty walk-through guide to see you though this Twitter automation process.
The difficult part now is coming up with great and engaging content to share with your followers. Go out there, and get creative. Use the knowledge you gathered here to promote your social media content to the world in the most effective way possible.