You’ve finished editing your video, and it’s finally ready for the world. But getting it from your computer onto YouTube and in front of the right audience involves more than just hitting "upload." There's a tried-and-true process that seasoned creators follow to make sure every video has the best possible chance to succeed.
Think of it less as a technical task and more as a launch sequence. We’re going to walk through that entire sequence, covering everything from prepping your file to the final click on "Publish."
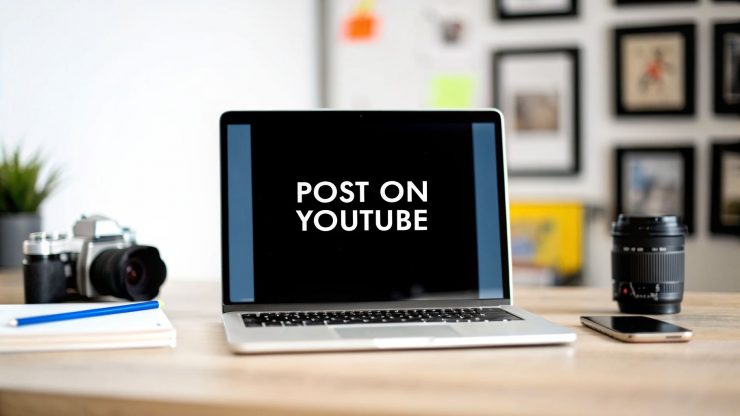
Your Quick Guide to Posting a YouTube Video

Learning how to post a video correctly is one of the first things you need to master. A thoughtful upload process ensures your video looks professional, gets found in search, and actually engages viewers. This is your pre-flight checklist before we dive deep into each specific step.
This is the roadmap that takes your video from a file on your hard drive to a polished piece of content on your audience's screens. We'll cover the key milestones that separate a casual upload from a strategic one.
It all boils down to a few key areas:
- File Preparation: This happens before you even open YouTube. Getting the format and filename right is a small step that prevents big headaches later.
- The Upload Itself: Navigating the YouTube Studio interface where you’ll input all your video's crucial details.
- Metadata Mastery: This is where the magic happens. We’re talking about writing compelling titles and descriptions that grab attention while also feeding the YouTube algorithm exactly what it wants to see.
- Final Touches & Publishing: Using features like end screens, captions, and scheduling to give your video a professional polish and a strong launch.
To give you a clean overview, the table below breaks down this entire workflow. It summarizes the main action you'll take at each stage and, more importantly, explains why it’s a non-negotiable part of the process.
The YouTube Posting Workflow at a Glance
| Stage | Key Action | Why It Matters |
|---|---|---|
| File Prep | Format, name, and compress your video file. | Prevents upload errors and gives YouTube initial SEO clues. |
| Upload Flow | Add details, thumbnails, and video elements in Studio. | Fills in crucial metadata for discovery and viewer experience. |
| Metadata | Write SEO-focused titles, descriptions, and tags. | Helps your video rank in search and get recommended. |
| Publishing | Set visibility, schedule, and promote your video. | Controls who sees your video and when, maximizing initial views. |
Whether you're just starting out or a seasoned pro looking for a quick refresher on best practices, internalizing this framework will set you up for success every single time you post. Now, let's get into the details.
Preparing Your Video File for a Flawless Upload
Before you even think about hitting that "Upload" button on YouTube, your video’s success story has already begun—right on your computer's hard drive. Getting your video file prepped correctly is one of those behind-the-scenes steps that can save you a world of frustration.
Think about it: a poorly prepared file can lead to painfully slow uploads, weird processing errors, or—worst of all—a pixelated, low-quality video for your audience. A little bit of prep work here goes a long way.
Choose the Right Format and Resolution
The name of the game is balancing beautiful video quality with a file size that won't take all day to upload. Luckily, the industry has pretty much settled on a perfect combination.
- File Container: Always export your video as an MP4 file. It's the universal standard and plays nice with just about everything.
- Video Codec: Stick with the H.264 codec. This is the magic that compresses your video, making the file size much smaller without trashing the visual quality.
- Aspect Ratio: A 16:9 aspect ratio is a must. This is the standard widescreen format for YouTube, ensuring your video fills the screen perfectly without those annoying black bars on the sides.
Most video editing programs, from Adobe Premiere Pro to free tools like DaVinci Resolve, have a built-in "YouTube 1080p" or "YouTube 4K" export preset. Honestly, just using one of these is the safest and easiest bet to get all these settings right.
Your export settings are a direct trade-off between upload speed and final quality. While 4K looks incredible, a standard 1080p (1920×1080) resolution is a perfect sweet spot for most content. It offers crisp visuals and much faster upload times.
Optimize Your File Name for SEO
Believe it or not, your video's SEO starts with the file name itself. YouTube's algorithm is a machine, and it starts trying to understand your video the second you begin uploading. The file name is one of its first clues.
Giving it a generic name like final_cut_v2.mp4 is a huge missed opportunity. It tells the algorithm absolutely nothing.
Instead, rename the file using your main keywords. For example, if I were making a video on this topic, I'd name the file something like how-to-post-on-youtube-guide.mp4. This tiny step gives your video an immediate SEO boost before you've even written a single word of your title.
If you find your file is still massive even after exporting, you can use other tools to compress it further without losing too much quality. We cover some great options in our guide to the best tools for content creators, which is packed with recommendations for video compression and other essentials. Taking these pre-upload steps seriously builds the foundation for a video that both looks great and gets found.
Navigating the YouTube Studio Upload Process
Alright, you’ve got your video file prepped and ready to go. Now it’s time to head into YouTube's command center: the YouTube Studio. If you're new to it, the uploader can seem a bit much, but it's really just a step-by-step workflow. Think of it as a conversation where you give YouTube all the details it needs to find the right audience for your video.
Your journey starts with a simple click on the “CREATE” button, followed by “Upload videos.” The moment you drag your file into the window, YouTube gets to work processing it in the background. This frees you up to focus on the important stuff—filling out the details across a few different screens.
Before you even get to that point, getting your file right is half the battle. A little prep work goes a long way.

As you can see, locking in your file format, resolution, and even the filename gives you a head start on a smooth upload and good search visibility.
Mastering the Upload Tabs
The upload interface is neatly organized into four main stages. Each one plays a distinct role in getting your video from your hard drive to your viewers.
- Details: This is ground zero. It's where you'll spend most of your time crafting your title, writing a compelling description, and uploading that all-important custom thumbnail. You’ll also add the video to playlists and make the mandatory declaration about whether the content is made for kids.
- Video Elements: This tab is all about keeping viewers engaged. Here, you can add subtitles (a must!), an end screen to point viewers to another video, and info cards that pop up with links during playback.
- Checks: While you're working, YouTube’s automated system is busy scanning your video in the background. It’s looking for potential copyright claims or anything that might make it unsuitable for ads. This is your chance to catch and fix problems before you hit publish.
- Visibility: The final step. This is where you decide who sees your video and when. You can go Public immediately, keep it Unlisted (visible only to those with the link), or set it to Private (only you and specific people you invite can see it).
A piece of advice I give everyone: always upload as 'Private' or 'Unlisted' first. This gives the 'Checks' tab time to do its thing and, more importantly, allows YouTube to finish processing the HD and 4K versions. There’s nothing worse than getting comments about a blurry video just because you published it too soon. Wait for that 'HD' badge to appear!
A Pro Tip for Descriptions and Chapters
Your video's description is valuable real estate—don’t waste it. One of the easiest yet most powerful ways to enhance your video is by using timestamps to create chapters. Just list the key sections of your video with their timecodes (like 00:00 Intro, 01:15 Main Topic).
This simple action has two incredible benefits:
- It creates a better viewer experience. People can jump straight to the information they need, making them more likely to watch longer and feel satisfied.
- It's a huge SEO booster. Google often pulls these chapters directly into its search results, giving your video extra visibility outside of YouTube. Suddenly, your video isn't just a video; it's a direct answer to a search query.
By treating each screen in the uploader with care, you're doing more than just posting on YouTube. You're strategically launching your content for the best possible performance.
Okay, your video file is prepped and the upload is humming along. Now for the hard part—making sure people actually find it.
Getting your video onto YouTube is one thing; getting it discovered in a sea of endless content is another battle entirely. Your title and description are the two most powerful weapons you have for this fight.
Writing Titles and Descriptions That Attract Views
Think of your video's title as a shop window display. It has to grab attention and convince someone to come inside, all while being stuffed with the exact keywords they just typed into the search bar. A flat, uninspired title renders your video almost invisible, no matter how brilliant your content is.
Crafting Clickable, SEO-Friendly Titles
The best titles walk a fine line between being search-engine-friendly and irresistibly clickable for a human. It's not enough to just include your main keyword; you need to spark curiosity or promise a solution to a problem.
A title like "Gardening Tips," for example, is dead on arrival. It's too generic and will get buried instantly.
Let's try again. What about "How to Grow Tomatoes (Even in a Small Apartment)"? Now we're talking. It targets the keyword "how to grow tomatoes" while speaking directly to a specific audience with a clear benefit.
Here are a few title formulas I've seen work time and time again:
- The How-To: "How to Post on YouTube for Beginners"
- The List: "5 Common Mistakes to Avoid When Posting on YouTube"
- The "Secret" Angle: "The Thumbnail Secret That Doubled My Views"
- The Question: "Are You Making This YouTube SEO Mistake?"
A great title feels like a direct answer to a question someone would actually ask. It’s all about blending those crucial keywords with a human touch. A lot of the same psychology applies to blog posts, and our guide on how to write perfect headlines for your blog posts has some great tips that are easily adaptable for YouTube.
Structuring a Powerful Video Description
Your video description is your secret SEO weapon and your chance to give viewers more context and value. Don't just toss a few sentences in there and call it a day. This is prime real estate.
The first 2-3 lines are absolutely critical. This is the text everyone sees before clicking "Show more," so use it for your most important message—a strong hook, a link to your website, or a clear call-to-action.
After that, write a short, conversational paragraph or two explaining what the video is about. Naturally weave in your main and secondary keywords. Just describe the video like you would to a friend. This helps the algorithm understand your content on a deeper level.
The competition is fierce. In 2026, over 500 hours of new video are uploaded to YouTube every single minute. And with 2.7 billion monthly active users, standing out is less about the 'upload' button and more about your discovery strategy.
Finally, fill the rest of the description with helpful resources:
- Timestamps: As we covered earlier, these create chapters and are a huge boost for user experience and SEO.
- Links: Drop in links to other relevant videos, your social media profiles, or any products you mentioned.
- Hashtags: Add 3-5 relevant hashtags to the very bottom. They act as another signal to the algorithm about your video's topic.
What's the Deal with Tags in 2026?
So, what about that "Tags" box? Honestly, don't lose sleep over it.
Years ago, tags were a massive part of YouTube SEO. Now? Not so much. YouTube's own guidance confirms that your title, thumbnail, and description carry far more weight in getting your video discovered.
My advice is to treat tags as a final, low-priority step. Add your main keyword, a few variations, and maybe your channel name. It's also a good spot to add common misspellings of your topic. But don't waste time trying to fill all 500 characters. Your energy is much better spent writing a killer title and a genuinely helpful description.
Using Smart Scheduling for Maximum Post-Publish Reach

Hitting "Upload" is a great feeling, but your job isn't quite done. The moment your video finishes processing is actually a critical strategic point. Just throwing it up on the channel by hitting "Public" right away can be a huge missed opportunity.
This is all handled in the "Visibility" tab during the upload process. The real power here lies in not just publishing, but when you publish.
Think about it like this: You wouldn't host a party at 3 AM on a Tuesday. You want to launch your video when your audience is actually around, scrolling, and ready to watch. That’s where scheduling comes in.
Public, Premiere, or Scheduled?
YouTube gives you three distinct ways to take your video live, and the one you choose can seriously affect its initial performance. That first burst of viewership is a huge signal to the algorithm, so you want to get it right.
Publish Now (Public): This makes the video live instantly. It's the right call for truly time-sensitive content, like reporting on breaking news or dropping a quick reaction to something that just went viral. Speed is the name of the game.
Schedule: This is the workhorse for most creators. You upload the video, finalize all the details, and then set it to go public at a specific date and time. It’s the key to maintaining a consistent, predictable posting schedule for your audience.
Premiere: A Premiere is like a movie opening. It’s a scheduled post, but it builds anticipation by creating a public watch page ahead of time. When it's time for the video to go live, you and your audience can watch it together for the first time, complete with a live chat. It’s fantastic for turning a video launch into a community event.
For a standard weekly video, scheduling is your best bet. For a big-ticket project, a channel anniversary, or a major announcement, a Premiere can build incredible buzz. For a deeper look into timing, we've broken down all the data on the best time to upload YouTube videos.
Automate Your Social Promotion
Once your video is live on YouTube, the next job is to tell the world about it. This is where a little bit of automation can save you a ton of time and get your video in front of way more people.
A single YouTube video can become the source of your social media posts for days, even weeks, consistently driving new viewers back to your channel.
This is exactly what tools like EvergreenFeed are designed for. When you connect it with a social media scheduler like Buffer, you can build a system that automatically promotes your new videos across all your accounts.
Consider this: In 2026, the average YouTube video is pulling in 687.21 views. That's a massive 76% increase from the previous year, yet creators only upped their posting frequency by a slim 4%. The takeaway? It's not about working harder; it's about working smarter. The algorithm is getting incredibly good at finding the right viewers, and tools that automate your promotion are what give you an edge. You can dig into more of this kind of data in these YouTube statistics from Metricool.
Here’s a simple, powerful workflow you can set up:
- Inside EvergreenFeed, create a new content category and call it something like "New YouTube Videos."
- Every time you publish a new video on YouTube, just drop the link into that category.
- Then, set up a recurring schedule in EvergreenFeed that tells Buffer to grab a link from your "New YouTube Videos" category and share it on Twitter, Facebook, LinkedIn, or wherever else you have an audience.
With this system in place, you’re no longer just uploading a video. You’re kicking off a promotional campaign that keeps working for you long after you've moved on to creating your next piece of content.
Answering Your Top YouTube Questions
Even after you’ve uploaded hundreds of videos, a few nagging questions always seem to pop up. Getting these details right from the start can be the difference between a smooth launch and a frustrating one. Let's walk through some of the most common ones I hear from other creators.
What’s the Best Time of Day to Post on YouTube?
This is the million-dollar question, isn't it? While tons of blogs will give you a generic "best time," the real, most reliable answer is already waiting for you inside your own channel's data.
Head over to YouTube Studio, click into "Analytics," and then select the "Audience" tab. You'll see a chart that shows you exactly when your viewers are most active on YouTube. That’s your goldmine.
Sure, you’ll hear general advice about weekday afternoons (around 2-4 PM EST) or weekend mornings (9-11 AM EST) being solid choices. But nothing beats your own analytics. Trust the data your audience gives you.
A crucial pro-tip: Always upload your videos as "Private" or "Unlisted" first. This gives YouTube’s servers time to finish processing the HD and 4K versions before you go live. It’s a simple step that ensures your first viewers get the crisp, high-quality experience they expect, and you won't get comments asking why the video is "blurry."
How Long Does YouTube Take to Process a Video?
Ever hit "upload" and then find yourself staring at that spinning "processing" icon for what feels like an eternity? We've all been there. How long it takes really comes down to a few key things:
- Video Length: A quick 30-second Short will be ready in a flash, while a 2-hour podcast will take its sweet time.
- File Size: The bigger the file, the more there is for YouTube's servers to chew on.
- Resolution: This is the big one. A 4K video file takes dramatically longer to process all its quality versions compared to a standard 1080p video.
As a general rule, a typical 10-minute video at 1080p might take a few minutes up to half an hour. That same video in 4K could easily take over an hour. Just remember that YouTube always gets a low-res (SD) version ready first while it works on the HD and 4K versions in the background.
Can I Edit My Video After It’s Posted?
The answer is a bit of a "yes and no." YouTube gives you some surprisingly handy, albeit limited, editing tools right inside the Studio. After you post, you can still:
- Trim the very beginning or end of your video.
- Cut out entire chunks from the middle.
- Blur faces or other sensitive objects.
- Replace the entire audio track with a song from the YouTube Audio Library.
Of course, you can always go back and tweak your video's title, thumbnail, description, or tags anytime you want.
What you cannot do is replace the video file itself with an updated one. If you need to make a major change that requires a re-upload, you’ll have to publish a brand new video, which means losing all the views, comments, and analytics tied to the original. While this guide is about getting your content up, knowing how to manage it afterward is just as important. For instance, sometimes a situation requires more drastic measures, and you might need to know how to remove a negative video from YouTube. For most revisions, though, your best bet is to upload the new version and simply unlist or delete the old one.
You pour so much effort into creating great YouTube videos. Don't let them get buried and forgotten after a few days. With EvergreenFeed, you can turn every video into a promotion that runs on autopilot, automatically sharing it across your social channels on a schedule you set. Give your best content the endless reach it deserves. Try it for free and see the difference.