
Posting a video on Twitter is technically simple—you just compose a new tweet and hit the media icon. But the real magic isn't in the how, it's in understanding why video has become absolutely essential for getting noticed on the platform.
Why Posting Videos on Twitter Is a Game Changer

Before we get into the step-by-step, let's talk strategy. Twitter, or X as it's now known, has evolved far beyond its 140-character roots. It's a fast, visual, and noisy arena. If you're still relying solely on text, you're missing a huge opportunity to actually connect with people.
The reason is dead simple: video stops the scroll. Think about your own habits. In a feed that moves a mile a minute, a static image or a chunk of text is easy to fly past. But motion? Motion grabs the human eye and makes people pause.
The Undeniable Power of Engagement
The data on this is overwhelming. Tweets that include video consistently blow text-only tweets out of the water. This isn't just about feeling good with vanity metrics; it’s about driving real results for your brand and growing your audience.
Here’s what I’ve seen time and again:
- Engagement Skyrockets: Videos just get more interaction. The blend of visuals, sound, and movement creates an immersive little package that naturally encourages more likes, replies, and reposts.
- People Actually Remember You: Viewers are far more likely to retain a message they saw in a video compared to one they just read. This is huge for brand recall and making sure your point sticks long after they've moved on.
- You Can Tell a Real Story: Video gives you the power to tell a much richer story in a short time. You can show genuine emotion, demo a product in action, or share a customer's success in a way that text alone could never match. You can dive deeper into this in our article on video content.
Backed by Statistics
The numbers don't lie. Tweets with video get a staggering 10 times more engagement than those without. In 2024, users are watching an estimated 8.3 billion videos on the platform every single day. That’s a 40% jump year-over-year, proving video isn't just a trend—it's the new standard.
The bottom line is this: learning how to post a video on Twitter isn't just another task to check off. It's a core skill for any modern content strategy, and the return on investment in terms of visibility and connection is massive.
To really make this work, your videos need to be part of a bigger picture. A smart plan ensures every video you post supports your larger marketing goals. Understanding this context will help you develop an effective Twitter marketing strategy that truly delivers.
Mastering Twitter Video Requirements: Specs for a Perfect Upload
There's nothing more frustrating than crafting the perfect video, only to have the upload fail. Before you even think about hitting "Post," you need to make sure your video file is actually built for Twitter (now X). Getting these specs right from the get-go saves a ton of time and avoids those maddening error messages.
The platform has a pretty clear set of rules for video uploads. If you stray from them, you're just asking for trouble with errors or, even worse, a pixelated, low-quality final product. Think of these requirements as the foundation of your post. Get them right, and everything you build on top—your killer captions, your strategic hashtags—will have a much better chance of succeeding.
Core Video Specifications You Need to Know
For most of us, the technical side is actually pretty simple. The main goal is to export a video that plays nicely with Twitter's system. Nail these three things, and you'll sidestep the most common upload problems.
Here are the absolute non-negotiables:
- File Format: Stick with MP4 or MOV. Honestly, MP4 is your best bet; it's the universal language of web video and almost never causes issues.
- Video Codec: Always, always use H.264. It's the industry standard for a reason, offering that perfect blend of high quality and manageable file size that social media platforms love.
- Audio Codec: For audio, choose AAC LC (Low Complexity). It keeps your sound crisp and clear without bloating your file.
Getting these three codecs right is the key. It ensures Twitter's system can actually read and process your file without a hitch.
Pro Tip from the Trenches: When you're exporting from your editing software, you might see a few different H.264 options. Look for a profile setting like "High" or "Main." From my experience, this gives you a fantastic balance of quality and compression that works beautifully with Twitter's algorithm.
A Quick Guide to Twitter’s Video Specs
To make it even easier, here’s a quick reference table with all the key technical requirements you need to remember for a standard Twitter account. Keep this handy when you’re exporting your next video.
| Specification | Requirement |
|---|---|
| File Formats | MP4 (with H.264 codec) or MOV |
| Video Codec | H.264 (High Profile recommended) |
| Audio Codec | AAC LC (Low Complexity) |
| Max File Size | 512 MB |
| Max Duration | 2 minutes and 20 seconds (140 seconds) |
| Max Resolution | 1920 x 1200 (or 1200 x 1900) |
| Recommended Resolution | 1080p (1920×1080) for landscape, 1080×1080 for square |
| Aspect Ratio | Between 1:2.39 and 2.39:1 |
| Max Frame Rate | 60 FPS (30 FPS is often ideal) |
Sticking to these specs is your best bet for a smooth, high-quality upload every single time. It takes the guesswork out of the equation.
Dimensions and Duration Limits
Beyond the file type, the size, length, and shape of your video are just as important. These factors directly control how your content shows up in the feed and whether it gets accepted in the first place.
For a standard account, these are your hard limits:
- Maximum Length: That classic 2 minutes and 20 seconds (or 140 seconds). It’s a fun little throwback to Twitter's original 140-character limit.
- File Size: Keep it under 512 MB. Any larger and you’ll get an error.
- Frame Rate: You can go up to 60 FPS, but for most content, 30 FPS is the sweet spot and looks perfectly smooth.
- Resolution: The absolute max is 1920×1200, but a standard 1080p (1920×1080) is your go-to for crisp, clear video.
Now, it's true that users with an X Premium subscription get to play by different rules, with the ability to upload videos up to three hours long. But for the vast majority of brands and creators, working within the standard limits is the way to go. Let's be real, shorter videos often perform better anyway by keeping your audience hooked. The goal isn't just to get your video uploaded; it's to make sure it looks fantastic on every single device.
How to Post a Video on X (Twitter) From Your Desktop
While posting from your phone is perfect for in-the-moment clips, I find that uploading from a desktop gives you far more control. This is my go-to workflow for any polished, pre-edited video where the details really count. The process is simple and gives you access to a few extra tools that can make a big difference.
Getting started is easy. Just click the "Post" button and look for the media icon—the one that looks like a little mountain landscape. Clicking that will open up your computer’s file browser, where you can find and select the video you want to upload.
Once you’ve selected your file, X will start processing it, and this is where you can begin to fine-tune your post.
Editing and Optimizing Your Video
Before hitting publish, the desktop uploader has a few handy, built-in editing features. You don't need to fire up a separate video editor for these quick adjustments.
Here's what you can do right inside X:
- Trim Your Video: You can drag the start and end points of the video timeline to snip off any dead air at the beginning or end. It's a great way to get right to the good stuff.
- Choose a Custom Thumbnail: This is, without a doubt, the biggest advantage of uploading from your desktop. Instead of letting the platform pick a random, often unflattering frame, you can scrub through the video and select the perfect shot or even upload a completely custom thumbnail image. A great thumbnail is a magnet for clicks.
This visual guide breaks down the core video specs you need to hit for a smooth upload—think format, length, and file size.
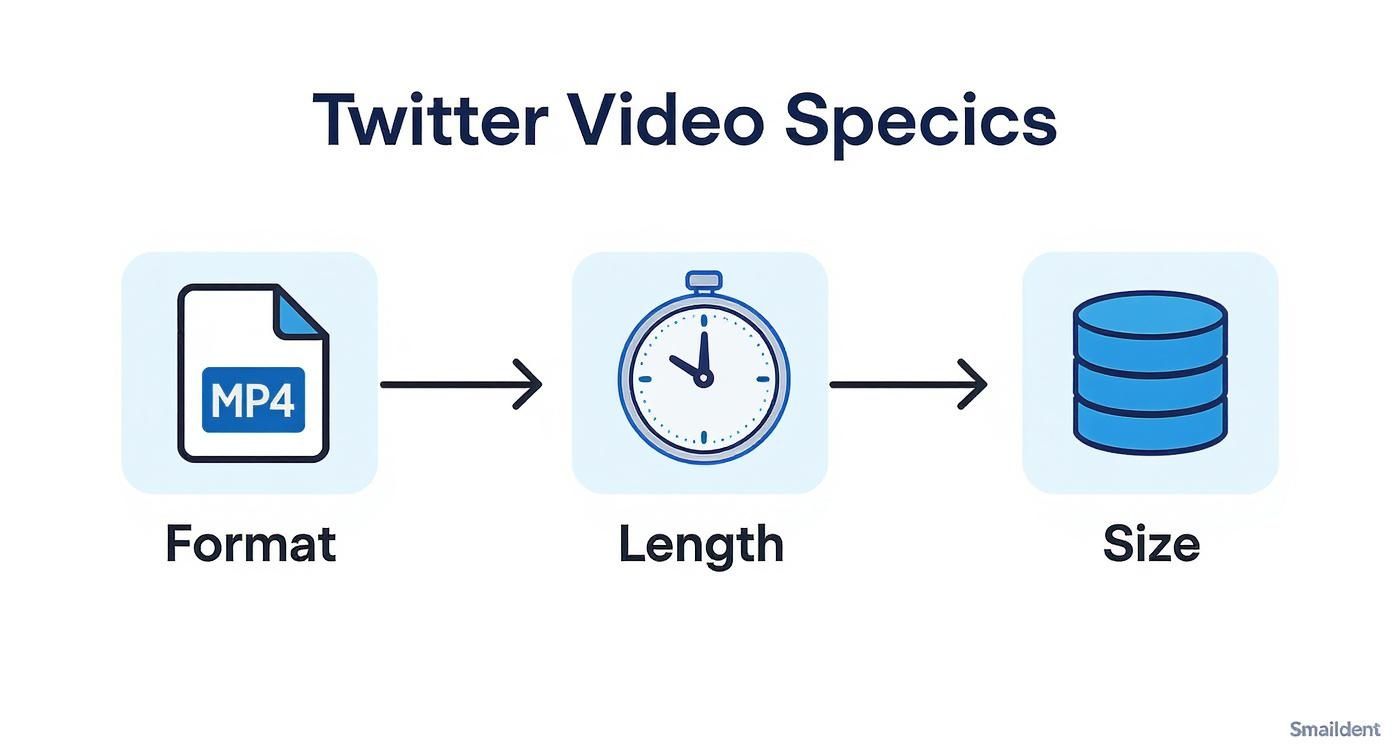
Stick to these guidelines, and you’ll avoid most of the common upload errors.
A quick tip from my own experience: Never skip the custom thumbnail. I've personally seen video engagement jump by over 30% just by swapping out a blurry, auto-generated frame for a clear, compelling custom image that teases the video's content. It’s a tiny step that delivers huge results.
Finalizing Your Post
After you've trimmed your video and picked a thumbnail, you can add the finishing touches in the Media Studio. This is where you'll handle things like your video's title, description, and, most importantly, captions.
This is also where you can upload an SRT caption file. Don't skip this! It's absolutely critical for accessibility and for grabbing the attention of the huge number of users who watch videos with the sound off.
Finally, it's time to write the text for your post. Craft a compelling sentence or two that sparks curiosity and gives people a reason to hit play. I recommend using 2-3 relevant hashtags to help your video get discovered and tagging any accounts featured in the video. Once you’re happy with everything, you can either post it right away or schedule it for the perfect time.
Posting Videos from Your Mobile Device
When you’re out and about, your phone is the fastest way to get content onto the platform. The mobile workflow for X is designed for speed, letting you share moments as they happen—whether you're at a live event or just have a quick, authentic update to share.
To kick things off, just tap the blue “+” button you see in the bottom-right corner. This opens up the composer. From there, tap the media icon (the one that looks like a little picture of a mountain) to pull up your phone’s gallery and choose a video you’ve already recorded.
You can also record a video right in the app. Just tap the camera icon instead of the media icon. This is my go-to for really spontaneous, in-the-moment content where getting it posted immediately is what matters most.
Fine-Tuning Your Video on the Go
After picking or recording your video, the app gives you a few handy editing tools. They aren't as powerful as what you'd find on a desktop, but they’re perfect for quick touch-ups.
You can easily trim your clip by dragging the handles on the video timeline. I use this all the time to chop off any dead air at the beginning or end, making sure the video jumps right into the good stuff.
You also have a few other great options to make your post more effective:
- Add Alt Text: Look for the "ALT" button on the video thumbnail and tap it to add a description. This is a huge deal for accessibility, as it helps users with screen readers understand your content.
- Tag Location: Use the location pin icon to add a geotag. This can really boost visibility if your video is tied to a specific place, like a conference or a local landmark.
- Include a Poll: Want to get people talking? Add a poll to your post right alongside the video. Ask a question about the clip to kickstart a conversation.
I’ve found that even a simple location tag can significantly boost local engagement. When I post a video from a marketing conference, tagging the venue often leads to more interactions from other attendees who are searching for content from the event.
Finalizing and Sharing Your Post
Once your video is trimmed and ready, the last piece of the puzzle is the text. Write a short, punchy caption that gives some context and makes people want to hit play. I always recommend adding one or two relevant hashtags—it’s the best way to make sure your video shows up in the right searches and conversations.
Before you send it off, give everything a quick once-over. The process is pretty much the same for both iOS and Android, so you're covered no matter which phone you use. When it looks good, hit the "Post" button, and your video is live. Just like that, you know how to post a video on X from your phone in just a few taps.
How to Optimize Videos for Maximum Engagement
Getting your video uploaded is just the first step. The real challenge—and the real win—is getting people to actually watch it, react, and share. Turning a simple upload into an engagement magnet often comes down to a few small, strategic adjustments that can make a huge difference in how your content performs.

It all starts with understanding how people behave on the platform. They scroll fast. And a massive number of them watch videos with the sound off. This reality should shape every single optimization choice you make, from your opening shot to your final call to action.
Craft a Powerful Three-Second Hook
You have about three seconds. That's it. If you don't grab someone's attention in that tiny window, they're gone. Your opening shot has to be visually arresting and immediately signal what the video is all about.
Here are a few tactics I've seen work time and again:
- Start with motion. Ditch the slow fades and static logos. Jump right into the action with a quick cut, a surprising zoom, or immediate character movement.
- Use bold on-screen text. A clear, punchy headline like "3 Twitter Video Mistakes You're Making" instantly tells the viewer the value they'll get.
- Ask a question. Posing a direct question in the first few frames creates an instant curiosity gap, encouraging viewers to stick around for the answer.
The goal isn't just to make something look good; it's to create an immediate need for information that makes the viewer feel like they have to keep watching.
The Critical Role of Closed Captions
This one is absolutely non-negotiable. People are browsing on the train, in a quiet office, or just multitasking with other audio playing. Without captions, you're essentially showing a silent film to a huge chunk of your potential audience. You're also completely excluding viewers who are deaf or hard of hearing.
Always add closed captions by uploading a dedicated .SRT file when you post from a desktop. While auto-captions are improving, they’re still notoriously unreliable. A clean, accurate .SRT file ensures your message is crystal clear and professional, which directly impacts comprehension and watch time.
Write Tweet Copy That Sparks Curiosity
Your video doesn't exist in a vacuum. The text of your tweet is the final piece of the puzzle, providing the context and a compelling reason to hit play (or turn the sound on).
Don't just describe what's in the video. You need to frame it in a way that creates intrigue. For example, instead of a flat "Here's a video of our new product," try something with more story, like, "We spent six months solving this one annoying problem. Here's how we did it." See the difference? That small shift turns a bland announcement into a narrative.
Tweets with video already outperform static posts, and well-crafted videos can even boost brand and message recall by 13%. It's also worth noting that ad viewers on X (formerly Twitter) spend 26% more time watching ads compared to other platforms, which shows that users are primed for video content if it's engaging.
Finding the perfect time to post is another crucial factor. You want your video to go live when your specific audience is most active and likely to see it. To really dial in your posting schedule, check out our guide on finding the best time to tweet. By combining a great video with strategic timing, you give your content the best possible chance to succeed.
Common Questions About Posting Twitter Videos
Even when you follow all the steps, things can still go sideways. Let's tackle some of the most common headaches people run into when posting videos to X, so you can get your content live without the frustration.
It's a familiar story: you create a beautiful, crisp video, but the second you upload it, it looks grainy and compressed. That’s X at work, trying to make videos load faster for everyone. The trick isn't to fight the compression but to give it a better file to work with from the start.
Why Does My Video Quality Look Bad After Uploading?
To get the best possible result, you need to control the variables before you even hit upload. Don't leave it to chance.
When you export your video, dial in these specific settings:
- Format: Stick with MP4 using an H.264 codec. It's the gold standard.
- Resolution: A standard 1920×1080 (1080p) is perfect for this.
- Bitrate: Aim for a bitrate somewhere between 5,000 and 10,000 kbps.
One more pro tip: always try to upload over a stable Wi-Fi connection. A spotty mobile signal can introduce errors during the upload, which only makes the final quality worse.
Can I Post a Video Longer Than 2 Minutes and 20 Seconds?
For most of us, that 2-minute and 20-second (or 140-second) limit is a hard wall. It’s a little throwback to the platform's original 140-character limit.
But there are ways around it. If you subscribe to X Premium, you can post much longer videos—up to 3 hours if you're on a desktop. For businesses, getting access to X's professional tools or using the Media Studio can also unlock longer video uploads and other handy features.
Even though longer videos are an option for some, remember that shorter, punchier content usually wins on X. That 140-second constraint forces you to be concise, which is exactly what a fast-scrolling audience appreciates.
How Do I Add Captions or Subtitles to My Video?
Adding captions is non-negotiable for engagement, and the best way to do it is by uploading a SubRip Subtitle (SRT) file. The catch? You have to do this from a desktop, as the mobile app doesn't support SRT uploads yet.
After you've uploaded your video on the desktop site, just click the "Edit" button. You’ll see an option to "Upload caption file." Select your SRT file, and it will sync up perfectly. This simple step makes your content accessible and incredibly effective for the huge number of people who watch videos with the sound off. For more workflow tips, explore our guide to help you schedule posts on Twitter and build a consistent content calendar.
Ready to save hours and keep your social media feeds consistently active? EvergreenFeed automates your content schedule by connecting to Buffer, so you can set it and forget it. Start your free trial today and see the difference. Learn more at https://www.evergreenfeed.com.