Trying to keep up with social media can feel like spinning plates, and the desire to just slap a Facebook post onto Instagram is real. It feels like a time-saver, a quick win. But honestly, that shortcut usually ends up hurting your engagement more than it helps.
The thing is, these platforms are two different worlds, with their own languages and expectations. A direct copy-paste job just doesn't translate well.
Why a Simple Copy-Paste Doesn't Cut It
I get it. When you're swamped, treating Facebook and Instagram as a single entity seems like a smart move. The problem is, this completely ignores the unique vibe of each platform. Facebook is all about conversation, sharing links, and building community. Instagram? It's a visual-first world, driven by aesthetics and telling stories through stunning images and video.
When you just republish the same exact content, it feels… off. It's jarring for your followers. Think about it: an Instagram user scrolling through beautiful photos doesn't want to hit a wall of text from a Facebook post, complete with a link they can't even click. That kind of disconnect is a recipe for low reach, fewer likes, and a weaker connection with your audience.
The "One-Size-Fits-All" Trap
A one-size-fits-all strategy is a trap because your followers on each platform have completely different expectations.
- Captions and Tone: On Facebook, you can get away with longer, more detailed captions—great for deep dives or big announcements. Instagram, on the other hand, is all about shorter, snappier text. The tone is often more personal, witty, or inspirational.
- Hashtags: A couple of well-chosen hashtags might work on Facebook, but they're the lifeblood of Instagram. Using 5-15 highly relevant hashtags is pretty standard if you want people to actually find your content.
- Visuals: Instagram is built for vertical content—think full-screen Reels and Stories. While Facebook is a bit more flexible with different shapes and sizes, that vertical video from Insta might look awkward in a Facebook feed, and vice-versa.
The real secret isn't about creating double the work. It's about taking one core idea and tailoring it to fit each platform's native environment. This approach saves you a ton of time without making your audience feel like an afterthought.
In this guide, I'm going to walk you through the best ways to share a Facebook post to Instagram, covering everything from Meta's own tools to some more advanced automation tricks. We'll focus on how to keep your brand message consistent while still playing by the rules of each platform. Let's dive into the smarter ways to cross-post that actually get you results.
Tying It All Together: Connecting Your Accounts in Meta Business Suite
First things first: before you can start pushing content from Facebook over to Instagram, you need to get them talking to each other. This means formally linking your accounts within Meta's ecosystem. Think of it as building a bridge that lets your posts and data travel seamlessly between your two platforms.
This entire setup happens inside the Meta Business Suite, which is the command center for anyone managing a business presence on Facebook or Instagram. If you've run a Facebook Page, you've probably spent some time in this dashboard already. The trick is knowing exactly where to look to find the account connection settings, as Meta likes to tuck them away.
Pinpointing the Right Settings
To kick things off, log into your Meta Business Suite. You'll want to find the main Settings menu, which is almost always a little gear icon tucked away in the bottom-left corner. Click that.
Once you're in the settings area, you're looking for a section related to your "Business assets" or "Account connections." This is where you'll tell Meta to link your Instagram account. It'll prompt you to log in to Instagram to confirm you own the account and give the Business Suite permission to post on your behalf.
Here’s a look at the dashboard that serves as your starting point for getting everything connected.

This unified dashboard is designed to make syncing your marketing efforts across both platforms much, much easier.
Making the Final Confirmation in Accounts Center
After you've authorized the connection from the Business Suite, Meta will likely shuttle you over to the Accounts Center. This is a super important final check. The Accounts Center gives you a bird's-eye view of all the profiles you manage—Facebook, Instagram, the works.
You should see both your Facebook Page and your Instagram business account listed there, side-by-side.
Pro Tip: If your accounts aren't showing up together in the Accounts Center, the connection isn't complete. This is the crucial step that unlocks the cross-posting features, so if something's missing, you won't be able to share posts between the two.
So, what if it doesn't work? The most common culprits are permissions. If you're not a full admin on the Facebook Page, you might not have the clearance to link new accounts. Another classic issue is trying to connect a personal Instagram profile; you must have an Instagram Business or Creator account for this to work. Checking those two things first will solve the problem 99% of the time.
As you get more comfortable with this workflow, you'll also want to stay on top of your content calendar. Keeping things organized is key, and it helps to know how to find scheduled posts on Facebook within the new interface.
Using the Native Cross-Posting Tool
Now that your accounts are linked, you can start sharing a Facebook post to Instagram directly through Meta's own tools. The Meta Business Suite is your command center for this, letting you create a piece of content once and push it out to both platforms simultaneously. It's a solid choice for straightforward posts like company announcements or event promotions where the message doesn't need a massive overhaul for each audience.
What's great about this feature is that it's more than just a blunt copy-and-paste. It’s a smart composer that understands that what works on Facebook doesn't always land on Instagram. From one screen, you can create a single post and then fine-tune the little details so it feels right at home on each platform.
Customizing Your Post for Each Platform
When you're in the Meta Business Suite composer, you’ll select both your Facebook Page and your Instagram account. Look for the option to "Customize post for Facebook and Instagram." This is where the magic happens. Clicking it opens up separate text boxes for each network, giving you full control over the captions, hashtags, and any tags you want to use.
Let's say you're promoting a new blog post. The way you'd set it up would be completely different for each platform.
- For Facebook: You have room for a longer caption and, most importantly, you can include a direct, clickable link to the article. You could also tag a collaborator's Facebook Page.
- For Instagram: Here, you'll want a shorter, snappier caption. Since links in the main feed aren't clickable, you'll pivot your call-to-action to something like "Link in bio!" and add 5-10 relevant hashtags to help people find your post.
This is the kind of control you need. It ensures your content doesn't just appear on both platforms—it actually belongs there.
Why This Tool Works for One-Off Posts
For its sheer simplicity and speed, the native cross-posting tool is fantastic. It’s perfect for those one-off posts that need to go live everywhere at the same time, without getting a third-party app involved.
This method is particularly clutch for time-sensitive updates. Think flash sale announcements or breaking industry news. You get the efficiency of posting to two places at once, but with the critical ability to optimize for each.
But here’s the catch: relying on this tool for everything has its downsides. It’s a completely manual process. Every single post has to be created from scratch, every single time. If you're trying to scale your content strategy or keep a consistent schedule using a bank of evergreen content, this becomes a huge time sink. This is where different cross-posting on social media strategies become essential for smarter, long-term planning.
For your daily content grind or managing a high volume of posts, this one-at-a-time approach just isn't sustainable. It's designed for in-the-moment convenience, not for building a powerful, automated content machine. Once your content needs start to grow, you'll find yourself looking for tools that can schedule and recycle your best posts with a lot less manual work.
Adapting Your Content for Maximum Engagement
Moving a Facebook post to Instagram is more of a translation than a simple transfer. Just because the tech lets you publish the same content everywhere doesn’t mean you should. Each platform has its own vibe, and ignoring that is the fastest way to see your engagement flatline.
The goal isn't just to show up on both channels; it's to actually connect with people. Think about it: someone scrolling through their Facebook feed is often in a different headspace than someone tapping through Instagram Stories. One might be catching up on news from friends, while the other is looking for a quick dose of visual inspiration. Your content needs to meet them where they are.
Fine-Tuning Your Visuals
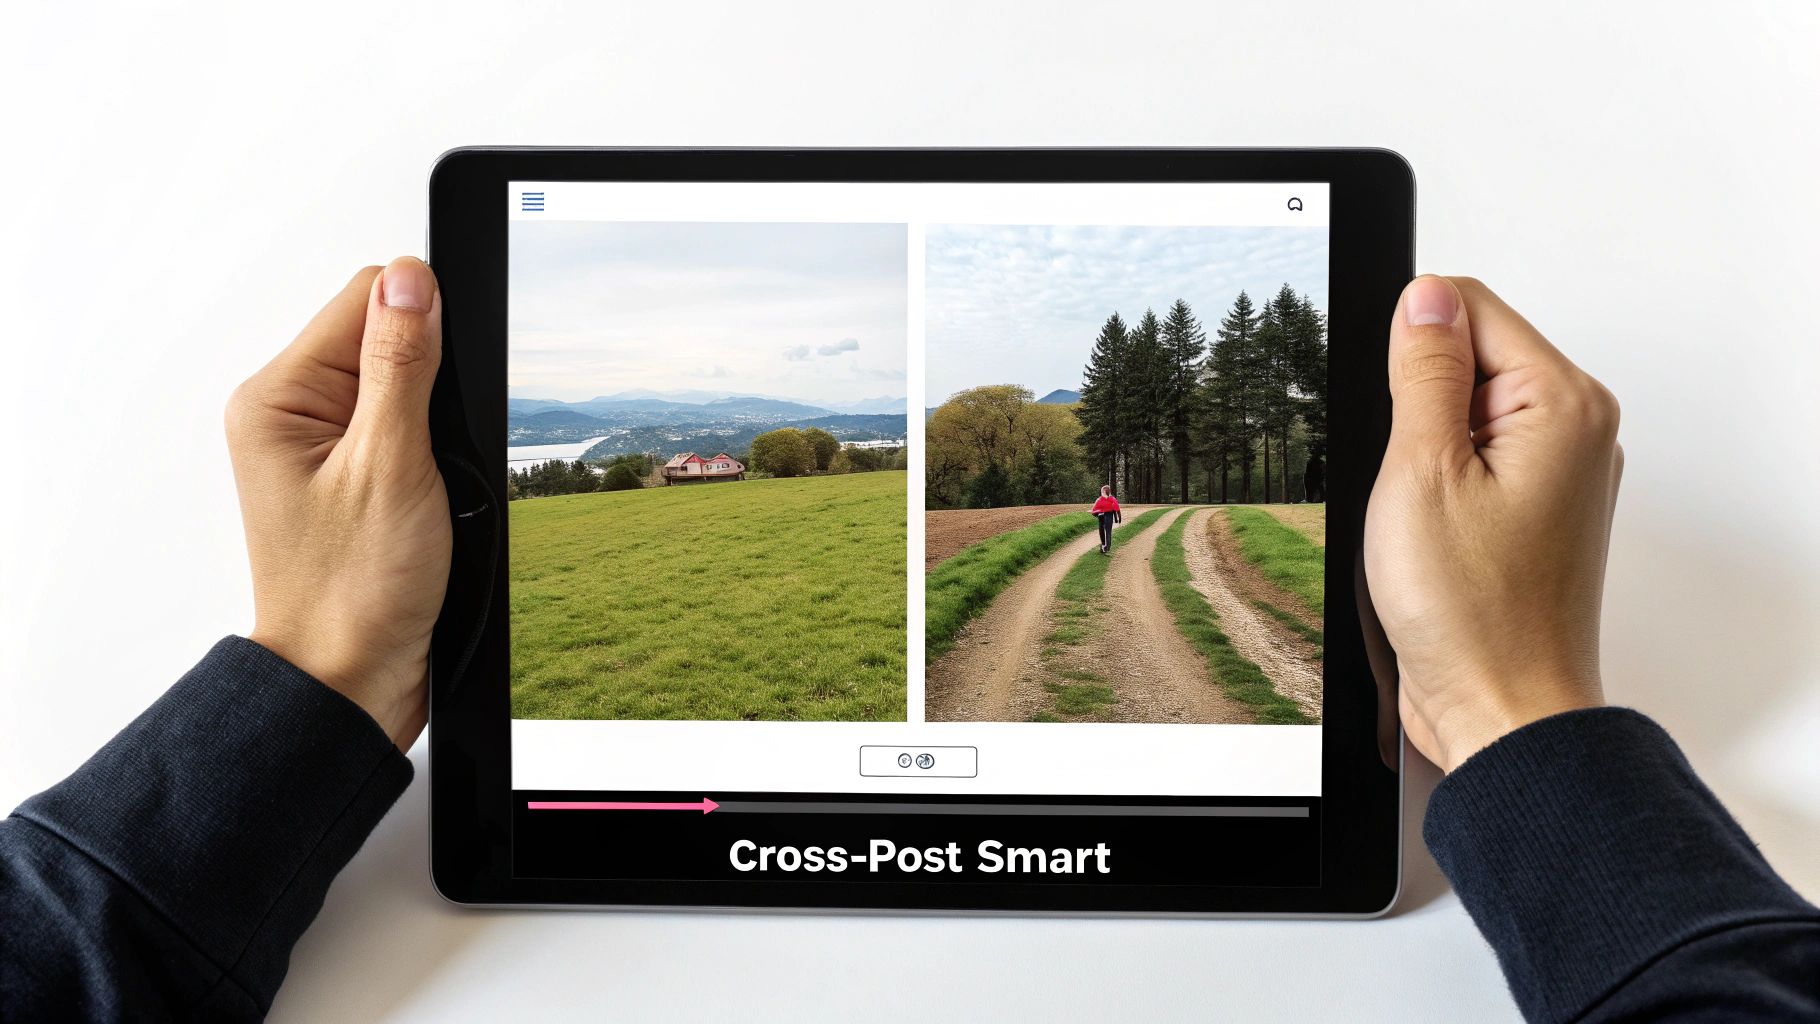
The most obvious difference between Facebook and Instagram is how they handle visuals. Instagram is a vertical-first world, plain and simple. If you want to make an impact, your images and videos need to fill the screen.
- On Instagram: You absolutely want to use vertical aspect ratios. Think 4:5 for feed posts and the full-screen 9:16 for Reels and Stories. A square (1:1) image can work in a pinch, but a horizontal photo ported over from Facebook just looks lost, surrounded by awkward dead space.
- On Facebook: This platform is way more flexible. It handles horizontal, square, and even vertical media pretty well. The catch is that a beautiful 9:16 Reel that looks perfect on Instagram might get cropped oddly in a Facebook feed preview.
My go-to strategy? Create the main visual for Instagram first. Once you have that perfect vertical asset, you can easily crop or adapt a version for Facebook. This approach ensures your content looks polished and professional on the more visually demanding platform. If you're looking for inspiration on how to make your content pop, checking out some Instagram-specific projects can spark some great ideas.
Nailing the Caption and Hashtags
Okay, visuals are sorted. Now for the words. A long, link-heavy Facebook caption is a complete no-go on Instagram.
On Facebook, you can get away with longer paragraphs and, most importantly, clickable links. It's built for driving traffic directly to a blog or product page. Instagram is a different beast. Captions need to be punchy and engaging, and your only real call-to-action is pointing people to that single, precious link in your bio.
Hashtags are another huge piece of the puzzle. A couple of hashtags on a Facebook post is fine, but on Instagram, they’re the engine of discovery. A single post armed with 10-15 relevant hashtags can pull in a wave of new viewers who aren’t even following you yet.
Pro Tip: Simply copying a Facebook caption over to Instagram—complete with a non-clickable link and zero hashtags—is a massive missed opportunity. Take the extra 60 seconds to rewrite it, add a solid block of relevant hashtags, and change your call-to-action to "link in bio."
This isn’t just about being a perfectionist; it’s about being effective. Platform-native strategies always outperform a one-size-fits-all approach. For a deeper dive, our guide on how to get more engagement on Instagram is packed with actionable tips.
Automating Your Evergreen Content Workflow
While Meta Business Suite is handy for posting in the moment, if you want a truly hands-off system, you'll need something more powerful. This is where automation tools really shine, especially for managing your best-performing, evergreen content. I'm talking about your top blog posts, timeless quotes, or foundational tips—the assets that deliver value time and time again.
Bringing a scheduler like Buffer into the mix gives you a clean, intuitive calendar to plan your Instagram content weeks or even months out. You can drag and drop posts, lock in specific times, and get a bird's-eye view of your entire content pipeline. Just this one change is a massive upgrade from manually pushing every single Facebook post to Instagram.
But the real game-changer is pairing Buffer with an automation engine like EvergreenFeed. This combo is what creates a true "set it and forget it" workflow for your most valuable content.
Building Your Content Library
The key to making this work is to stop seeing your content as a one-time thing. Instead, start thinking in terms of content libraries, or "buckets," filled with your greatest hits. For example, a business coach I worked with set up separate libraries for:
- Motivational Quotes: Quick, shareable graphics that always get a good response.
- Blog Post Highlights: Key takeaways from their most popular articles, which we turned into simple Instagram carousels.
- Client Testimonials: Powerful social proof that does the selling for them.
Once you load this content into a tool like EvergreenFeed, it becomes a reusable asset. You write the caption once, add your hashtags once, and upload the image or video once. That’s it. The system handles the rest.
Setting Up Your Automated Schedule
After your content libraries are stocked, you just connect EvergreenFeed to your Buffer account. This is where you tell the system how often you want to post. You can set rules like, "Post one quote to Instagram every Monday at 9 AM" and "Share one blog post highlight every Wednesday and Friday afternoon."
The system is smart enough to pull a random post from the right library and drop it into your Buffer queue. This keeps your feed fresh and you never have to worry about posting the same thing back-to-back. Your Buffer calendar just magically fills itself up, keeping your Instagram active without you having to touch it.
This workflow completely changes the game. Content creation shifts from a daily grind to a one-time setup. You put in the effort upfront to build your libraries, and the automation takes care of the tedious scheduling. This frees you up to actually focus on strategy and talking to your community.
When you're adapting content to go into this automated system, you'll need to tweak a few core components for each platform.
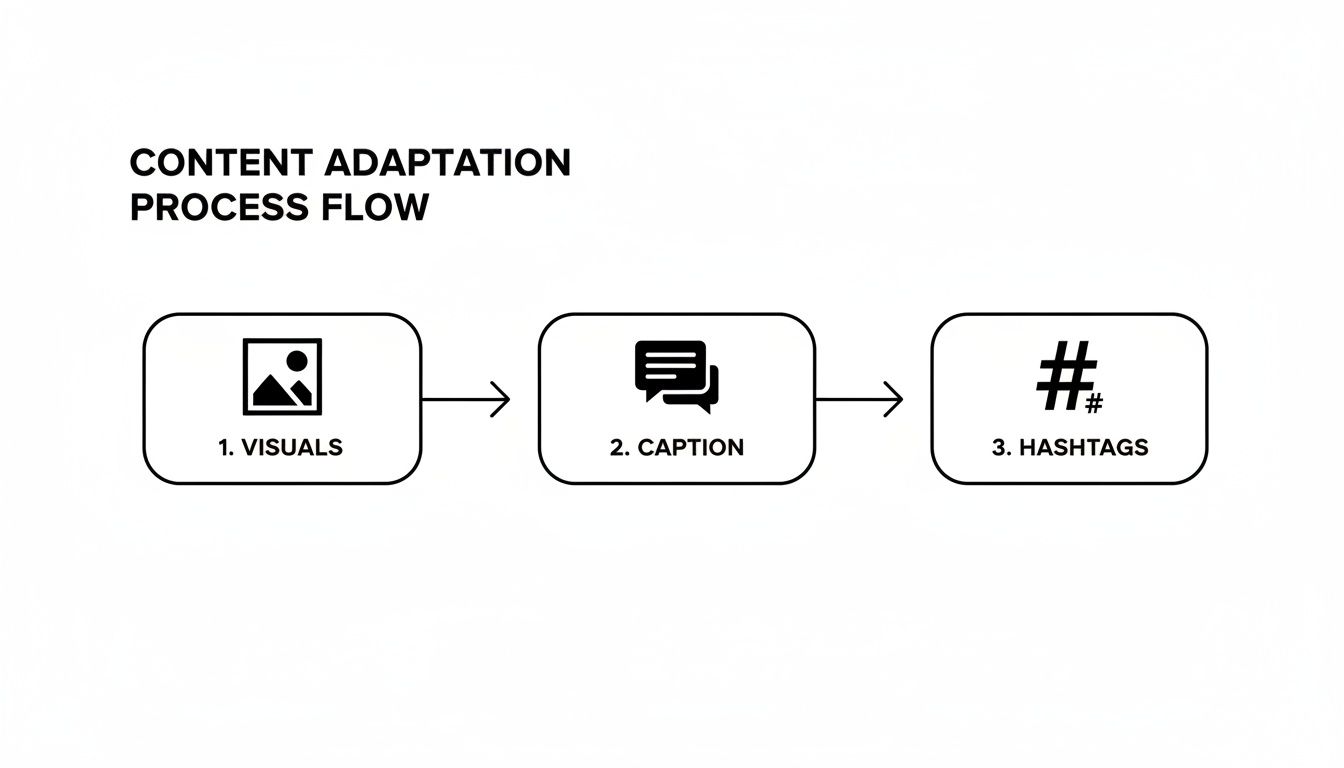
This simple flow shows that the visuals, caption, and hashtags all need a bit of a tune-up to perform their best on Instagram. For a deeper dive, one creator documented a 30-day experiment in automating Instagram posts that’s full of great insights. It’s the perfect approach if you want to consistently reshare your best content and drive engagement on autopilot.
Troubleshooting Common Cross-Posting Issues
Even with the slickest workflow, things can go sideways. Trying to push a Facebook post to Instagram only to be met with an error message is one of the most maddening parts of managing social media. Let’s dig into the usual suspects and how to fix them.
More often than not, the problem lies with the initial handshake between your accounts. If your posts are just not going through, your first stop should always be the account authorization settings inside Meta Business Suite. It's surprisingly common for things like a recent password update or a new two-factor authentication rule to silently break the connection, forcing you to re-link everything.
Resolving Connection and Permission Errors
The number one reason posts fail to cross-post is a faulty or outdated connection between Facebook and Instagram. If the scheduling tool—whether it's Meta's own or a third-party app—can't properly "see" your Instagram profile, your content is going nowhere.
Head back into the Accounts Center in your Meta settings. Double-check that your Facebook Page and your Instagram Business Account are both listed and showing a healthy connection.
See a little notification that says "Review Account Connection"? That's your smoking gun. Click it right away and go through the prompts to re-authorize the link. I'd estimate this one simple action fixes around 70% of all cross-posting failures I've ever encountered.
Another sneaky culprit is your role on the Facebook Page. To link and manage accounts, you absolutely must be an Admin. If your role is set to "Editor" or "Moderator," you simply won't have the permissions needed to handle these background connections.
Fixing Failed Media Uploads
Ever had your caption post perfectly but the image or video is nowhere to be seen? This almost always comes down to a format mismatch. Instagram can be incredibly particular about its media specs, especially when you compare it to Facebook's much more forgiving system.
If you’re having video trouble, run through this quick checklist:
- Aspect Ratio: Is the video vertical? Think 9:16 for Reels or 4:5 for a feed post. Trying to upload a horizontal 16:9 video is a common reason for rejection.
- File Length: Make sure your video isn't too long. Instagram Reels, for instance, have a hard cap (it's currently 90 seconds). Anything over that will fail.
- File Type: Don't get fancy. Stick to the basics like .MP4 or .MOV to avoid any compatibility headaches.
For images, the issue is usually the file size or dimensions. If an image won't upload, the quickest fix is to resize it to a standard width of 1080 pixels and save it again as a high-quality JPG. That little bit of optimization is often all it takes to get a stubborn post published.
A Few Common Questions About Cross-Posting
You've got the basics down, but a few common questions always pop up when people start cross-posting between Facebook and Instagram. Let's tackle them.
Can I share an old Facebook post to my Instagram Story?
This is a great question, but unfortunately, the answer is no. You can't directly take an already-published Facebook feed post and push it over to an Instagram Story.
Meta's built-in tools are all about publishing new content to both places at once. If you want to get an old favorite in front of your Story audience, you'll have to do it the old-fashioned way: save the photo or video from your original Facebook post and then upload it fresh inside the Instagram Story editor.
Is it actually better to post natively, or is cross-posting okay?
Honestly, the sweet spot is somewhere in the middle. There's no denying that a post created natively on a platform often feels more at home and might even get a slight edge in engagement.
That said, smart cross-posting is an incredible time-saver. My advice? Don't pick one or the other. Use cross-posting tools to handle the heavy lifting, but always take a minute to tweak your captions, hashtags, and even the media to fit the vibe of each platform. It's about working smarter, not harder.